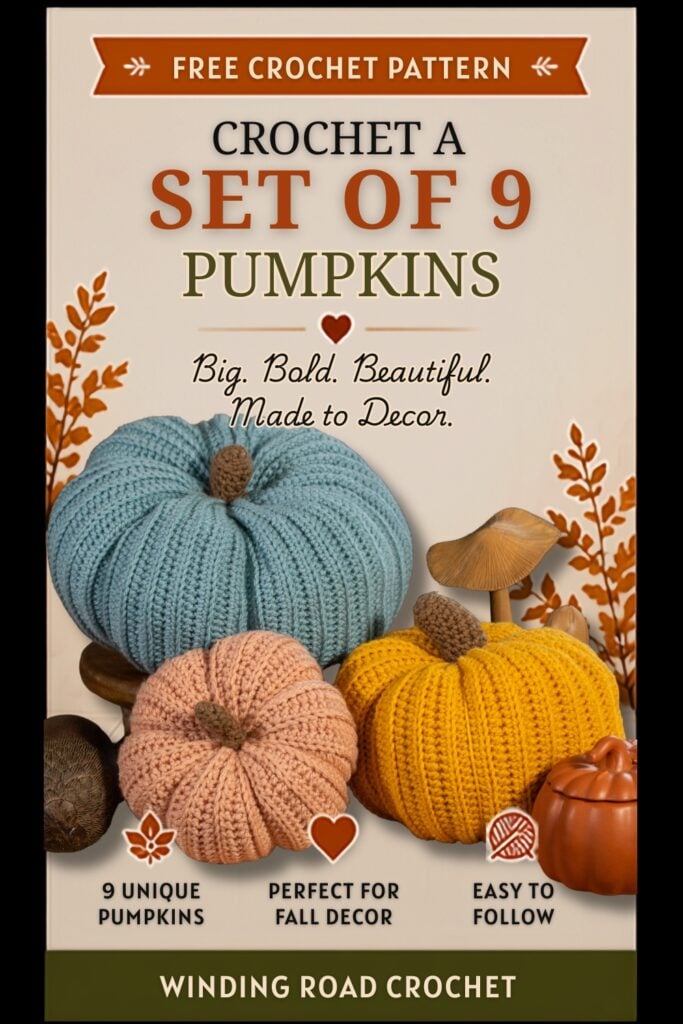
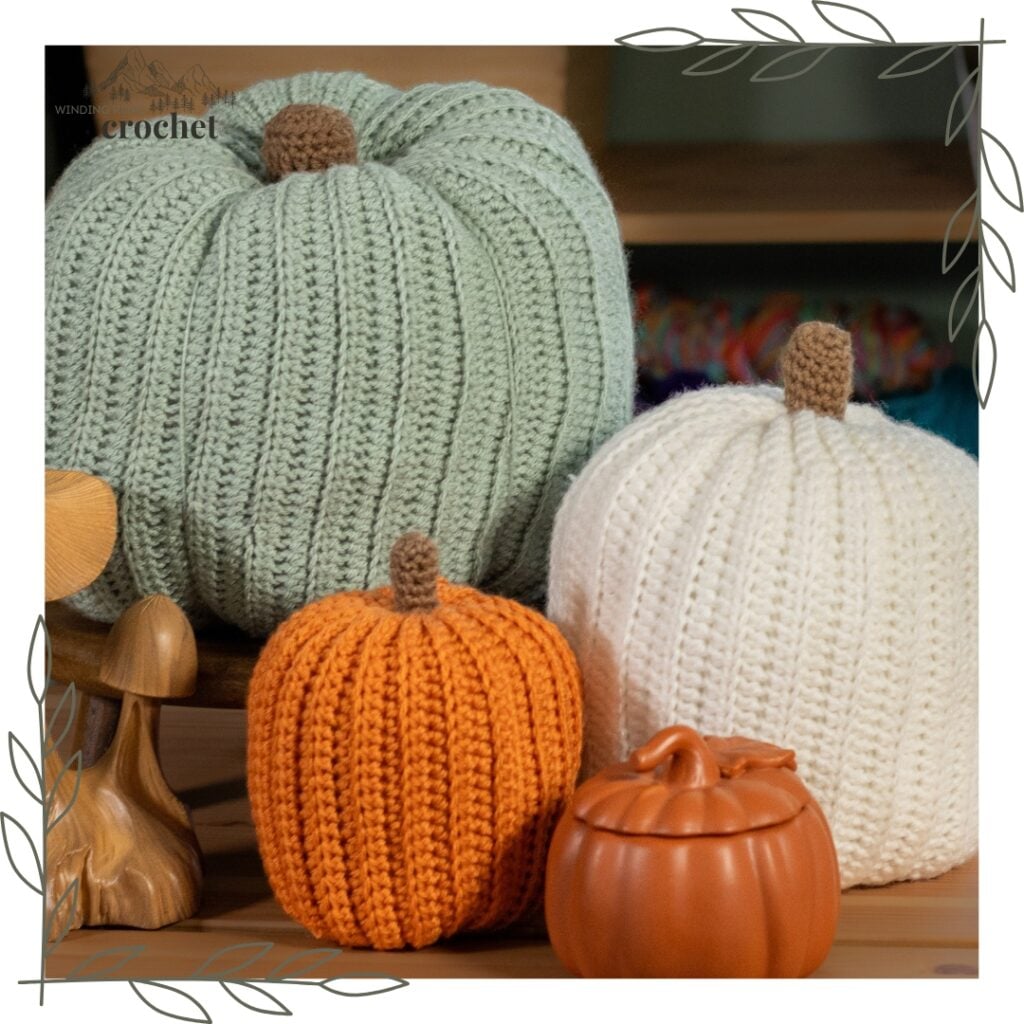
Turn your home into a pumpkin patch with this crochet pumpkin pattern set. It includes three different pumpkin shapes and three different pumpkin sizes. Use up your scrap yarn with these fun and free crochet patterns.
Below you will find the complete pattern and instructional photos for this Bountiful crochet pumpkin pattern set. You will also find all the materials, stitches, gauge, and sizing information. There is a link to a helpful video tutorial for assembly.
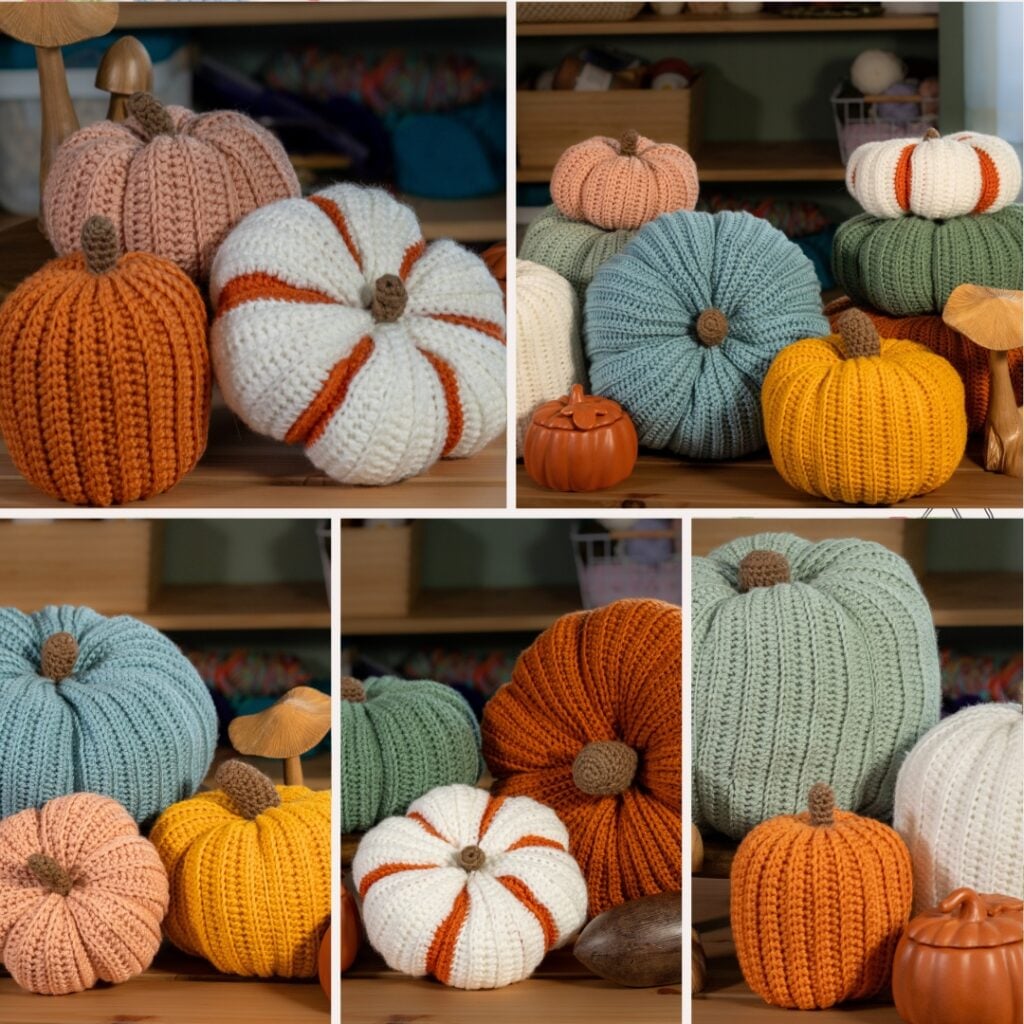
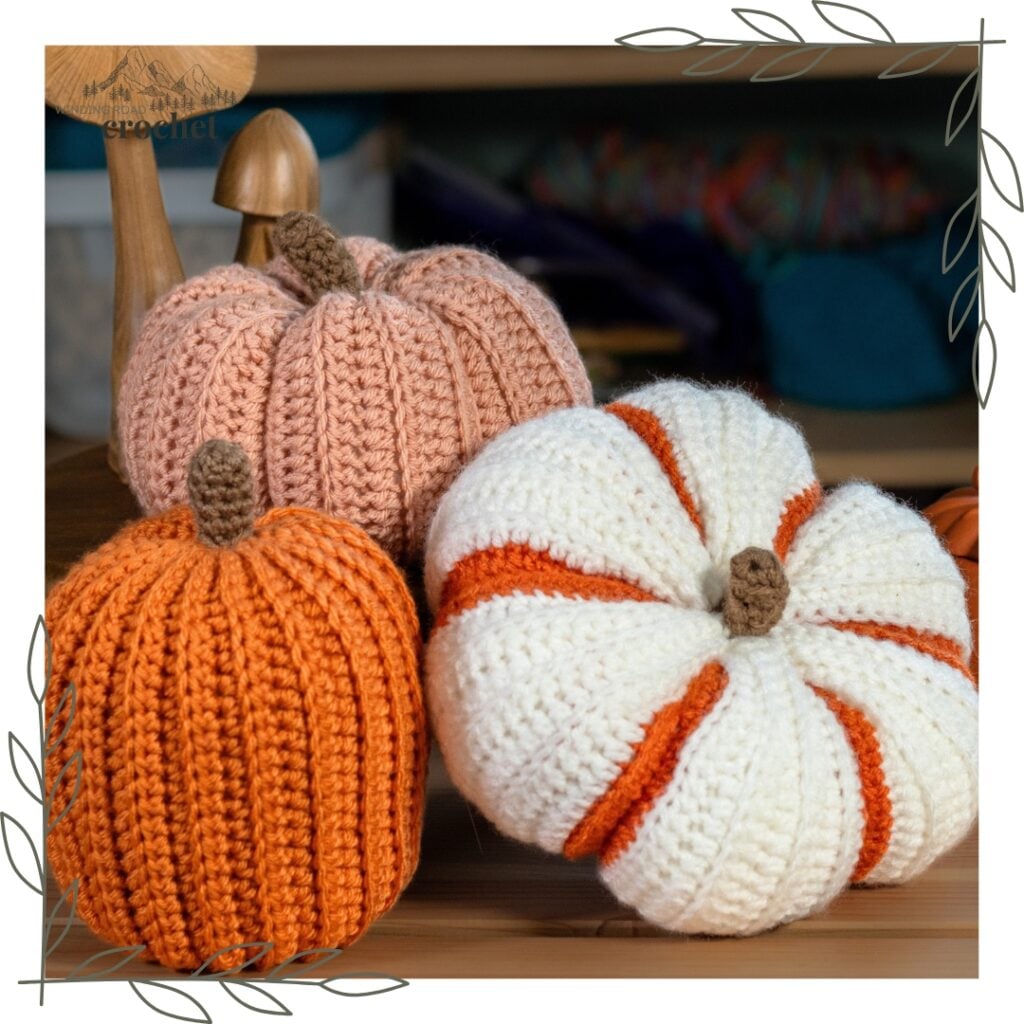
Pick your Pumpkin Pattern Shape!
Pumpkins come in so many shapes, and I wanted to let you decide what shape you want to make. There are wide and flat pumpkins that I am calling stacker pumpkins. There is your more traditional round pumpkin. Then I tried to make a tall pumpkin, and I succeeded in a way. It just depends on how you finish the pumpkin. If you add the segments to the pumpkin, then the pumpkin becomes shorter and a bit square. It still makes a beautiful and unique pumpkin.
You need pumpkins of all shapes and sizes if you want to crochet your own pumpkin patch. This pumpkin pattern set is a great place to start.
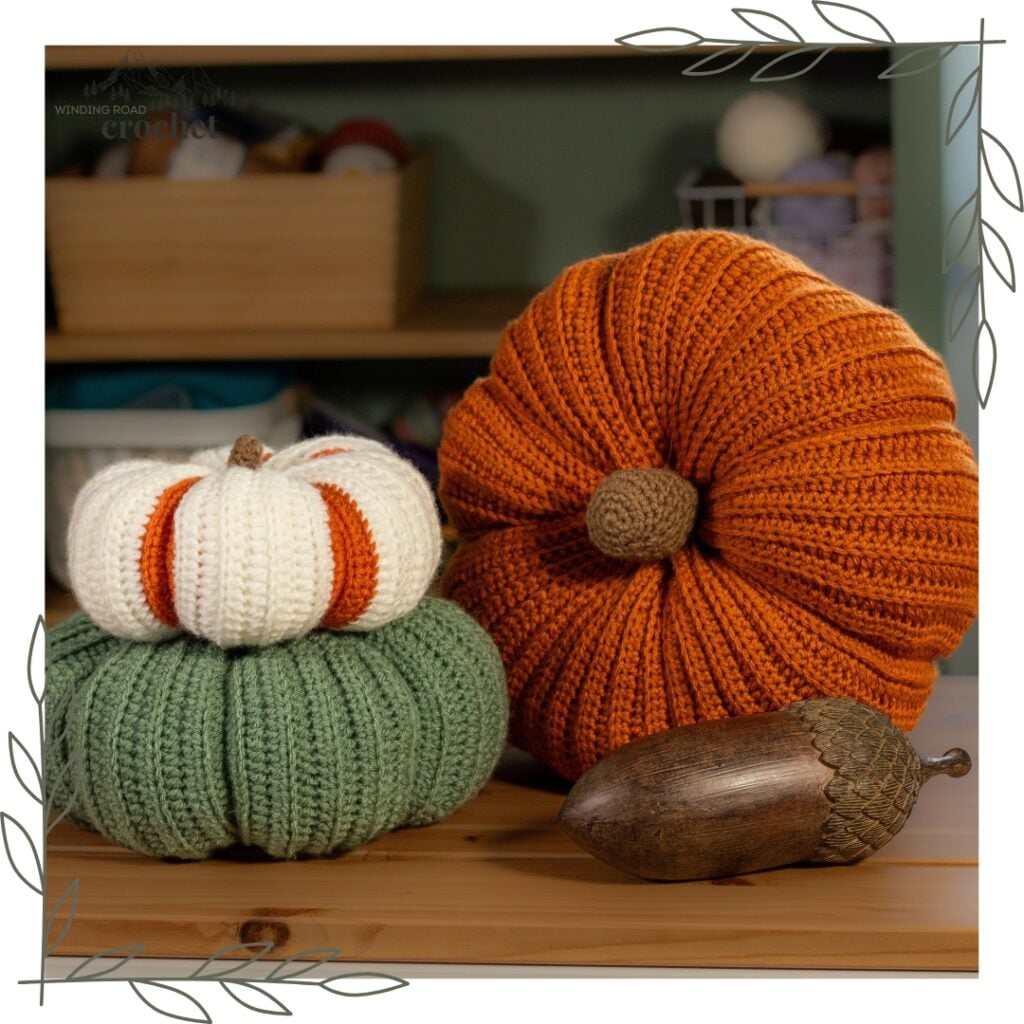
Pick your Pumpkin Size!
Pumpkins come in so many sizes, and I wanted to give you all of them. Each shape has a large, medium, and small size. Then you can find even more sizes on the pumpkins and gourds blog post that will provide you with small and mini pumpkins as well as some gourds.
A Plethora of fall crochet patterns!
Don’t forget to check out all the free patterns at Winding Road Crochet. You may just find a new favorite project.

1. Woodland Hooded Scarf | 2. Dragon Hooded Scarf | 3. Buttoned Plaid Scarf | 4. Plaid Cowl 5. Woven Cowl | 6. Odyssey Cowl | 7. Rainbow Scarf | 8. Texture Scarf | 9. Hooded Cowl
crochet supplies
Yarn
I Love This Yarn Acrylic (Weight: 4/medium – 355 yds / 325 m, 7 oz/ 199 g)
Yarn Quantity
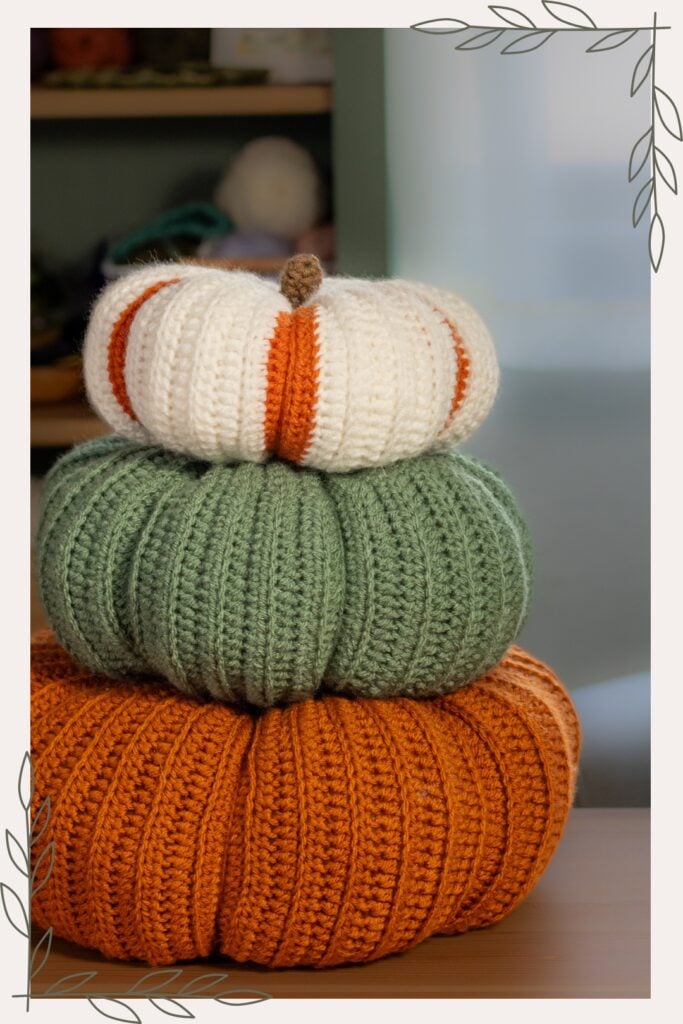
Small Stacker Pumpkin – 3 oz or 153 yds of White / Burnt Pumpkin
Medium Stacker Pumpkin – 5 oz or 254 yds of Dark Olive
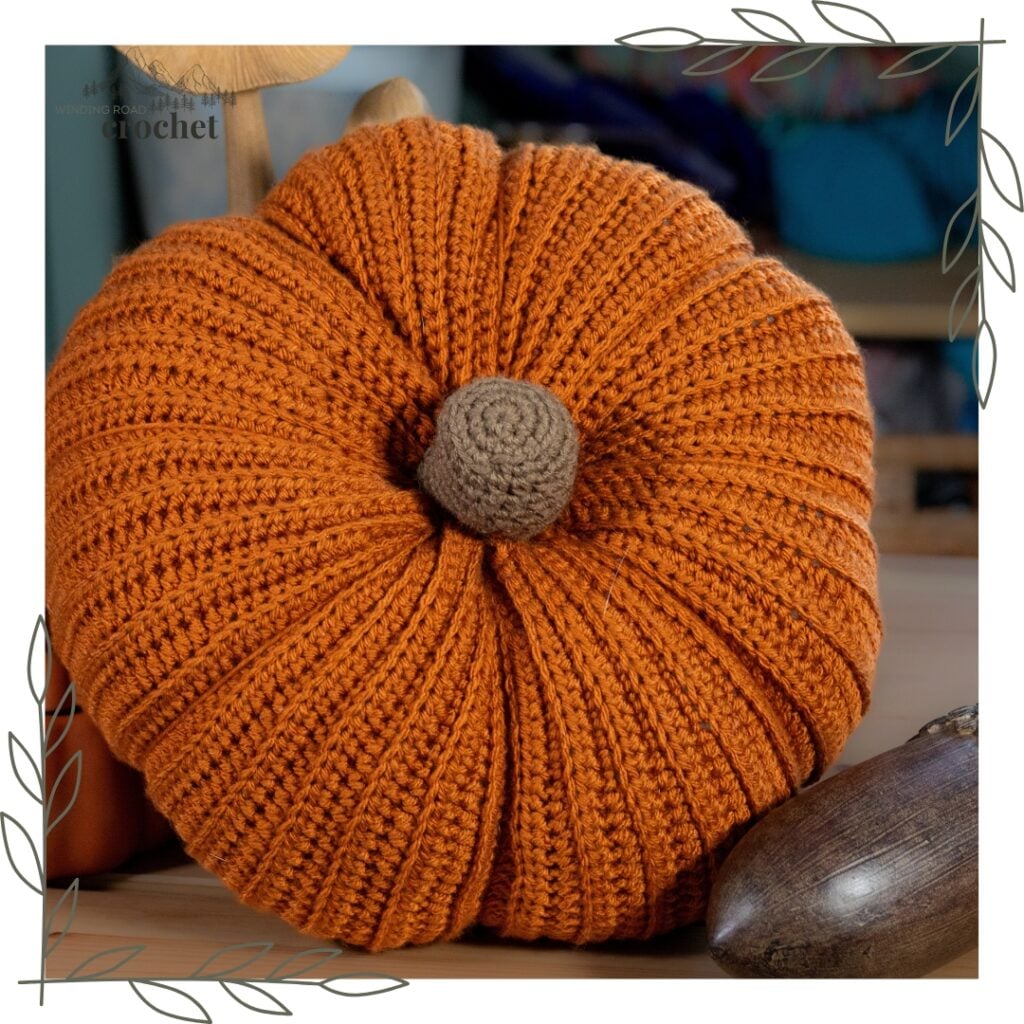
Large Stacker Pumpkin – 7 oz or 355 yds of Burnt Pumpkin
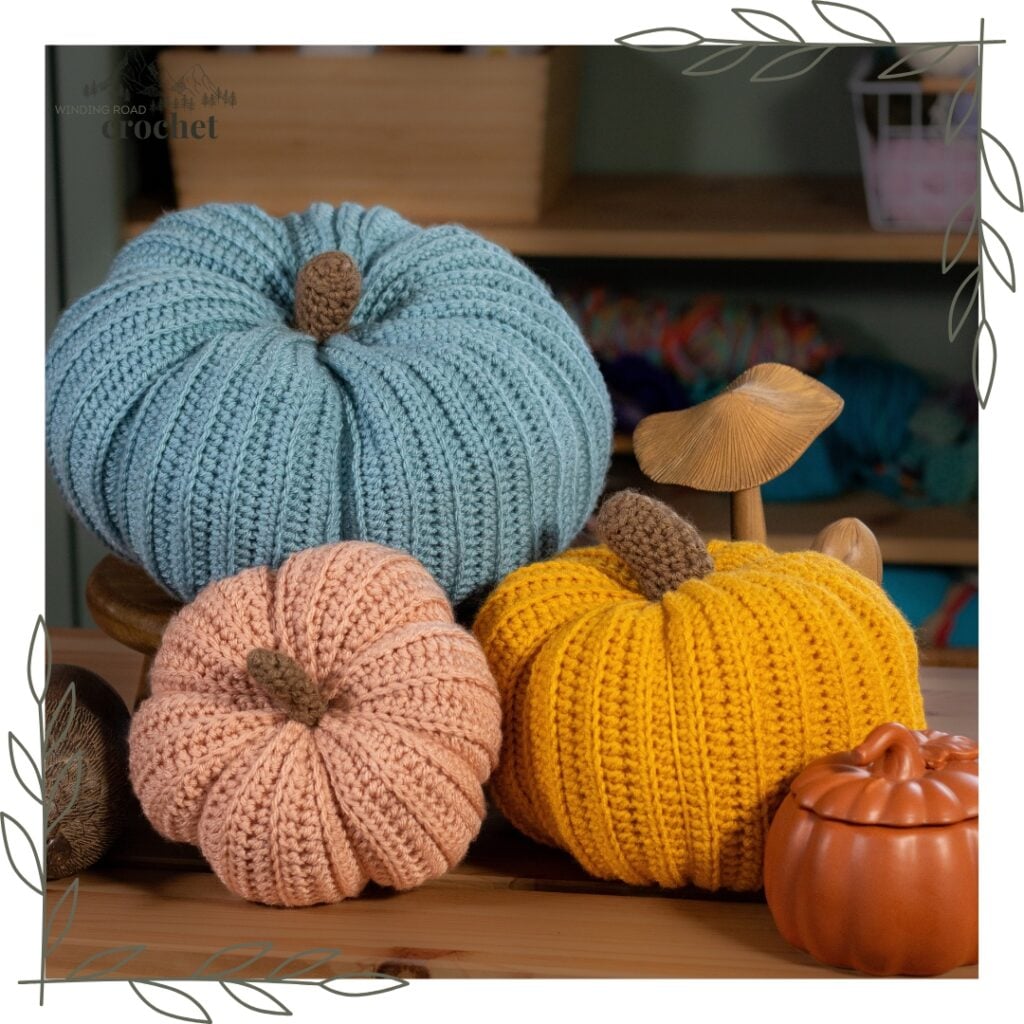
Small Round Pumpkin – 2.5 oz or 127 yds of Cherry Blossom
Medium Round Pumpkin – 4 oz or 203 yds of Sungold
Large Round Pumpkin – 7 oz or 355 yds of Medium Blue
Small Tall/Square Pumpkin – 2 oz or 102 yds of Desert Glaze
Medium Tall/Square Pumpkin – 3.75 oz or 191 yds of White
Large Tall/Square Pumpkin – 6 oz or 305 yds of Sea Blue
Yarn Substitutions
Any worsted weight (weight # 4) yarn would be fine. If you want your pumpkin to be the exact same size as mine, then make sure to check your gauge before starting your project. Suggestions include Red Heart Super Saver, Bernat Value, Red Heart With Love, I Love This Yarn from Hobby Lobby.
Hook
Crochet Hook, Size H, 5 mm
Notions
- Polyfil (A lot)
- Yarn Needle
- Scissors
- Locking Stitch Markers
- **Shop my Favorite Tools Here**

Skill Level – Easy
For this project, you must know how to work a magic circle, (though an alternative method is given). You will also need to know how to work in the back loops only and how to sew.
Stitches + Abbreviations
CH – Chain
MC – Magic Circle
SC – Single Crochet
HDC – Half Double Crochet
SLST – Slip Stitch
ST(s) – Stitch(es)
Gauge
8 BLOHDC x 5 Rows = 2 inches
Size
Small Stacker Pumpkin – 3″ tall by 14″ wide and 22″ circumference
Medium Stacker Pumpkin – 5″ tall by 18″ wide and 28.5″ circumference
Large Stacker Pumpkin – 6″ tall by 22″ wide and 34.5″ circumference
Small Round Pumpkin – 4″ tall by 10″ wide and 16″ circumference
Medium Round Pumpkin – 6″ tall by 14″ wide and 22″ circumference
Large Round Pumpkin – 8″ tall by 18″ wide and 28.5″ circumference
Small Tall/Square Pumpkin – 5″ tall by 8″ wide and 12.5″ circumference
Medium Tall/Square Pumpkin – 7.5″ tall by 12″ wide and 19″ circumference
Large Tall/Square Pumpkin – 10″ tall by 16″ wide and 25″ circumference
Note: For the tall/square pumpkins, the height listed is for the pumpkin when not segmented. The pumpkin will lose 1-3 inches of height when segmented.
pattern notes
- The pattern is written using American crochet terms.
- The pattern will be worked in continuous rounds for the stems and in rows for the pumpkin bodies.
- Use a stitch marker to keep track of your rows when making the stems.
- The Bountiful Crochet Pumpkin Pattern Set is copyrighted by Winding Road Crochet.
- Some patterns have an alternative round 1; this round can be used in place of round 1 and does not require a magic circle or ring.
- The turning chain does not count as a stitch when working in rows.
- Leave a LONG yarn end at the beginning and end of your project to use to sew and gather the pumpkin.
- Below are 9 pumpkin patterns and 3 stem patterns. You will crochet the pumpkin and stem, then follow the photo instructions to sew, gather, and stuff your pumpkin.
- If you choose, you can place something inside your pumpkin to give it more weight.
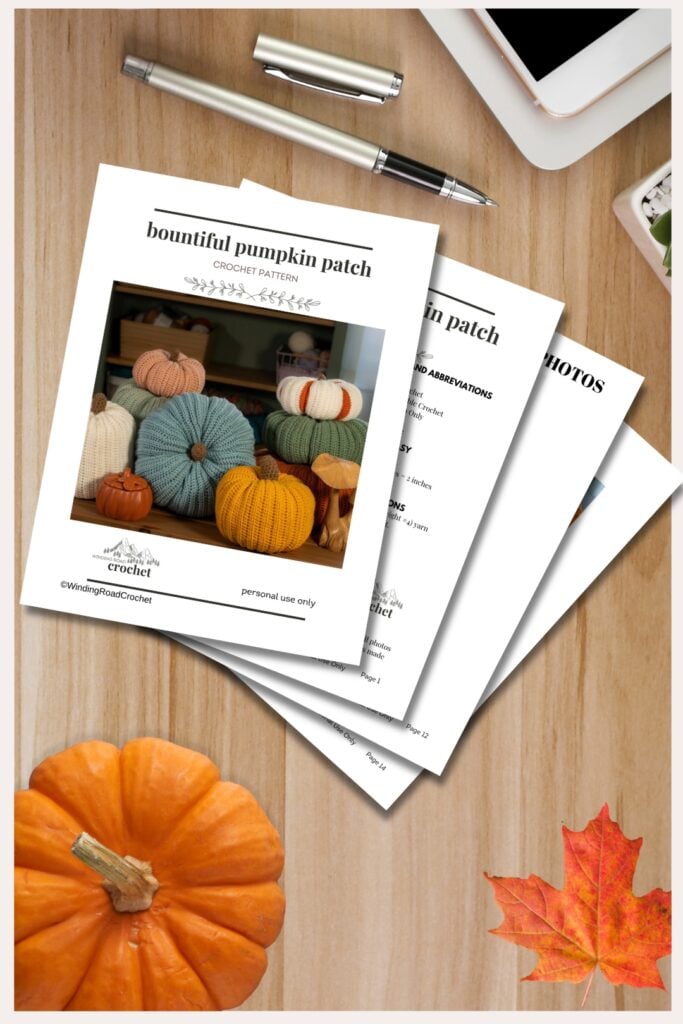
Upgrade to the Printable PDF.
Get the written pattern formatted into an easy-to-print PDF. It is perfect for on-the-go or on-the-couch crocheting.
PDF includes links to the video tutorial and instruction photos moved to the last page to help save on ink.
Assembly Video Tutorial
This pattern is assembled the same way as my previous pattern below. you can watch that video for assemble instructions. Don’t forget to subscribe to my YouTube Channel for more fun crochet video tutorials.
Bountiful Crochet Pumpkin Pattern Set
Small Stem
Round 1: Work 8 SC into a Magic circle. (8)
Alternative Round 1: CH 2, Work 8 SC into the 2nd CH from the hook. (8)
Rounds 2 – 5: SC in the next 8 STs. (8)
Fasten off. Leave yourself a long yarn end to sew the stem to the top of the pumpkin.
You can also work extra rounds to create a longer stem and more variation in your pumpkins.
Medium Stem
Round 1: Work 8 SC into a Magic circle. (8)
Alternative Round 1: CH 2, Work 8 SC into the 2nd CH from the hook. (8)
Round 2: Work 2 SC into the next 8 STs. (16)
Rounds 3 – 6: SC in the next 16 STs. (16)
Fasten off. Leave yourself a long yarn end to sew the stem to the top of the pumpkin.
You can also work extra rounds to create a longer stem and more variation in your pumpkins.
Large Stem
Round 1: Work 8 SC into a Magic circle. (8)
Alternative Round 1: CH 2, Work 8 SC into the 2nd CH from the hook. (8)
Round 2: Work 2 SC into the next 8 STs. (16)
Round 3: *Work a SC into the next ST, Work 2 SC into the next ST* repeat from *to* a total of 8 times. (24)
Rounds 4 – 7: SC in the next 24 STs. (24)
Fasten off. Leave yourself a long yarn end to sew the stem to the top of the pumpkin.
You can also work extra rounds to create a longer stem and more variation in your pumpkins.
Small Stacker Pumpkin
CH 37
Row 1: SC in second CH from hook, SC in next 4 CH, HDC in next 21 CH, SC in last 10 CH. (36)
Row 2: CH1, turn, BLOSC in first 5 STs, BLOHDC in next 21 STs, BLOSC in last 10 STs. (36)
Continue repeating row 2 until you have a total of 54 rows. Fasten off and leave an 18-inch yarn end. This will be used with the beginning yarn end to sew up your crochet pumpkin.
Medium Stacker Pumpkin
CH 49
Row 1: SC in second CH from hook, SC in next 6 CH, HDC in next 27 CH, SC in last 14 CH. (48)
Row 2: CH1, turn, BLOSC in first 7 STs, BLOHDC in next 27 STs, BLOSC in last 14 STs. (48)
Continue repeating row 2 until you have a total of 72 rows. Fasten off and leave an 21-inch yarn end. This will be used with the beginning yarn end to sew up your crochet pumpkin.
Large Stacker Pumpkin
CH 59
Row 1: SC in second CH from hook, SC in next 8 CH, HDC in next 31 CH, SC in last 18 CH. (58)
Row 2: CH1, turn, BLOSC in first 9 STs, BLOHDC in next 31 STs, BLOSC in last 18 STs. (58)
Continue repeating row 2 until you have a total of 84 rows. Fasten off and leave a 24-inch yarn end. This will be used with the beginning yarn end to sew up your crochet pumpkin.
Crochet Round Pumpkins
Small Round Crochet Pumpkin
CH 33
Row 1: SC in second CH from hook, SC in next 2 CH, HDC in next 23 CH, SC in last 6 CH. (32)
Row 2: CH1, turn, BLOSC in first 3 STs, BLOHDC in next 23 STs, BLOSC in last 6 STs. (32)
Continue repeating row 2 until you have a total of 43 rows. Fasten off and leave a 18-inch yarn end. This will be used with the beginning yarn end to sew up your crochet pumpkin.
Medium Round Crochet Pumpkin
CH 46
Row 1: SC in second CH from hook, SC in next 4 CH, HDC in next 30 CH, SC in last 10 CH. (45)
Row 2: CH1, turn, BLOSC in first 5 STs, BLOHDC in next 30 STs, BLOSC in last 10 STs. (45)
Continue repeating row 2 until you have a total of 54 rows. Fasten off and leave a 21-inch yarn end. This will be used with the beginning yarn end to sew up your crochet pumpkin.
Large Round Crochet Pumpkin
CH 61
Row 1: SC in second CH from hook, SC in next 6 CH, HDC in next 39 CH, SC in last 14 CH. (60)
Row 2: CH1, turn, BLOSC in first 7 STs, BLOHDC in next 39 STs, BLOSC in last 14 STs. (60)
Continue repeating row 2 until you have a total of 76 rows. Fasten off and leave a 24-inch yarn end. This will be used with the beginning yarn end to sew up your crochet pumpkin.
Small Tall / Square Pumpkin
CH 30
Row 1: SC in second CH from hook, SC in next 2 CH, HDC in next 20 CH, SC in last 6 CH. (29)
Row 2: CH1, turn, BLOSC in first 3 STs, BLOHDC in next 20 STs, BLOSC in last 6 STs. (29)
Continue repeating row 2 until you have a total of 42 rows. Fasten off and leave a 18-inch yarn end. This will be used with the beginning yarn end to sew up your crochet pumpkin.
Medium Tall / Square Pumpkin
CH 51
Row 1: SC in second CH from hook, SC in next 3 CH, HDC in next 38 CH, SC in last 8 CH. (50)
Row 2: CH1, turn, BLOSC in first 4 STs, BLOHDC in next 38 STs, BLOSC in last 8 STs. (50)
Continue repeating row 2 until you have a total of 48 rows. Fasten off and leave a 21-inch yarn end. This will be used with the beginning yarn end to sew up your crochet pumpkin.
Large Tall / Square Pumpkin
CH 71
Row 1: SC in second CH from hook, SC in next 6 CH, HDC in next 49 CH, SC in last 14 CH. (70)
Row 2: CH1, turn, BLOSC in first 7 STs, BLOHDC in next 49 STs, BLOSC in last 14 STs. (70)
Repeat row 2 until you have a total of 61 rows. Fasten off and leave an 24-inch yarn end. This will be used with the beginning yarn end to sew up your crochet pumpkin.
Crochet Pumpkin Sewing and Gathering Instructions
Now using your very long yarn ends, you can sew and gather your pumpkins. There is one way to gather the pumpkin, then 3 ways to finish the pumpkin.

Step 1: Sew a gathering stitch along the bottom of the squash and pull tight.
Step 2: Make 2 stitches to secure the gathering.

Step 3: Use a whip stitch to sew the two sides of the squash together.
Step 4: When you reach the top of your squash, knot your two yarn ends together to secure.

Step 5: Sew a gathering stitch around the top of the pumpkin.
Step 6: Stuff the pumpkin and pull the gathering stitch tight to close the top. Then you can stuff and sew the pumpkin stem on top.

Step 7: Knot the two yarn ends together to secure the gather. Make a few stitches to secure the stem and knot your yarn ends together again.
Step 8: If you like the way the pumpkin looks, then you can hide your yarn ends and be done. Or you can follow either of the optional instructions to add more details to your pumpkin.

Pumpkin Option 2: Cinched Pumpkin
For this pumpkin, we will use the yarn ends to cinch down the center of the pumpkin.
Step 9: Use a yarn needle to thread your yarn ends from the top to the bottom of the pumpkin.

Step 10: Pull the yarn ends tight and knot them together.
Step 11: Clip your yarn ends and hide them inside the pumpkin.
Now your cinched pumpkin is complete.

Pumpkin Option 3: Segmented Pumpkin
For this pumpkin, we will hide our current yarn ends and use a new strand of yarn to segment our pumpkin into 6 sections.
Step 9: Use a very long piece of yarn and use a needle to thread the yarn from the bottom to the top of the center of the pumpkin. Leave about 6 inches hanging out the bottom of the pumpkin.

Step 10: Wrap the yarn around the side of the pumpkin and reinsert the needle from the bottom to the top of the pumpkin.
Step 11: Wrap the yarn from around the side of the pumpkin once more directly across from the other yarn. The two strands of yarn will cut the pumpkin in half.

Step 12: Pull both yarn ends tight to create a ridge in the sides of the pumpkin. This will segment the pumpkin into two halves. Knot the two yarn ends together at the bottom of the pumpkin. Using the same piece of yarn, repeat steps 9-12 to create a total of 6 segmented sections.
Step 13: Using the same piece of yarn, repeat steps 9-12 to create a total of 6 segmented sections.
Now your Bountiful Crochet Pumpkin Pattern Set is complete and ready to be enjoyed. They work up fast and make a great decoration for fall.
Let’s Be Friends
Want to know what I am making next? Follow me on Instagram @windingroadcrochet to see sneak peeks of what I am up to and to be notified of when I release new free patterns. You can also follow me on Pinterest and Facebook. Join our Facebook group Our Crochet Journey and be a part of our community. Share, photos, ask for help, and be inspired all in one place!
Written pattern, tutorials, photos, graphs, and pdfs of the free Bountiful Crochet Pumpkin Pattern Set are copyright Windingroadcrochet.com. Please do not reprint or repost this content as your own, but please feel free to share this link with others. You can find more information on sharing my work with others on the Terms and Conditions Page.