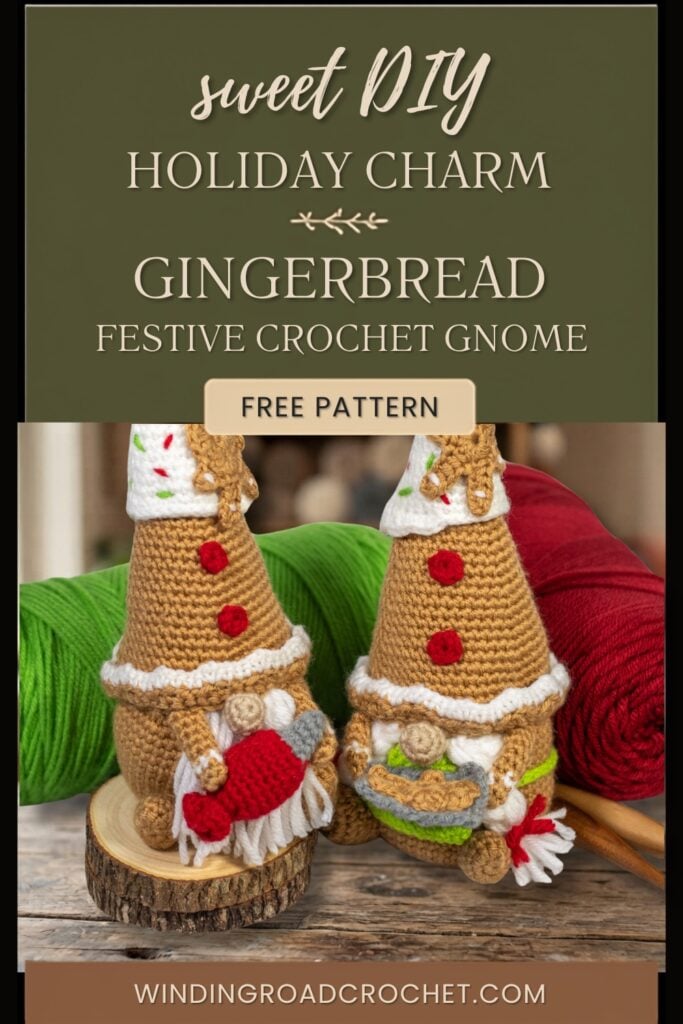
Celebrate Christmas with a quick and easy crochet gingerbread cookie gnome or two. Just follow the free crochet pattern to make a lovely gingerbread gnome couple.
Below are the complete crochet pattern and instructional photos for the crochet gingerbread cookie gnome pattern. You will also find the material list, stitch list, gauge, and sizing information.
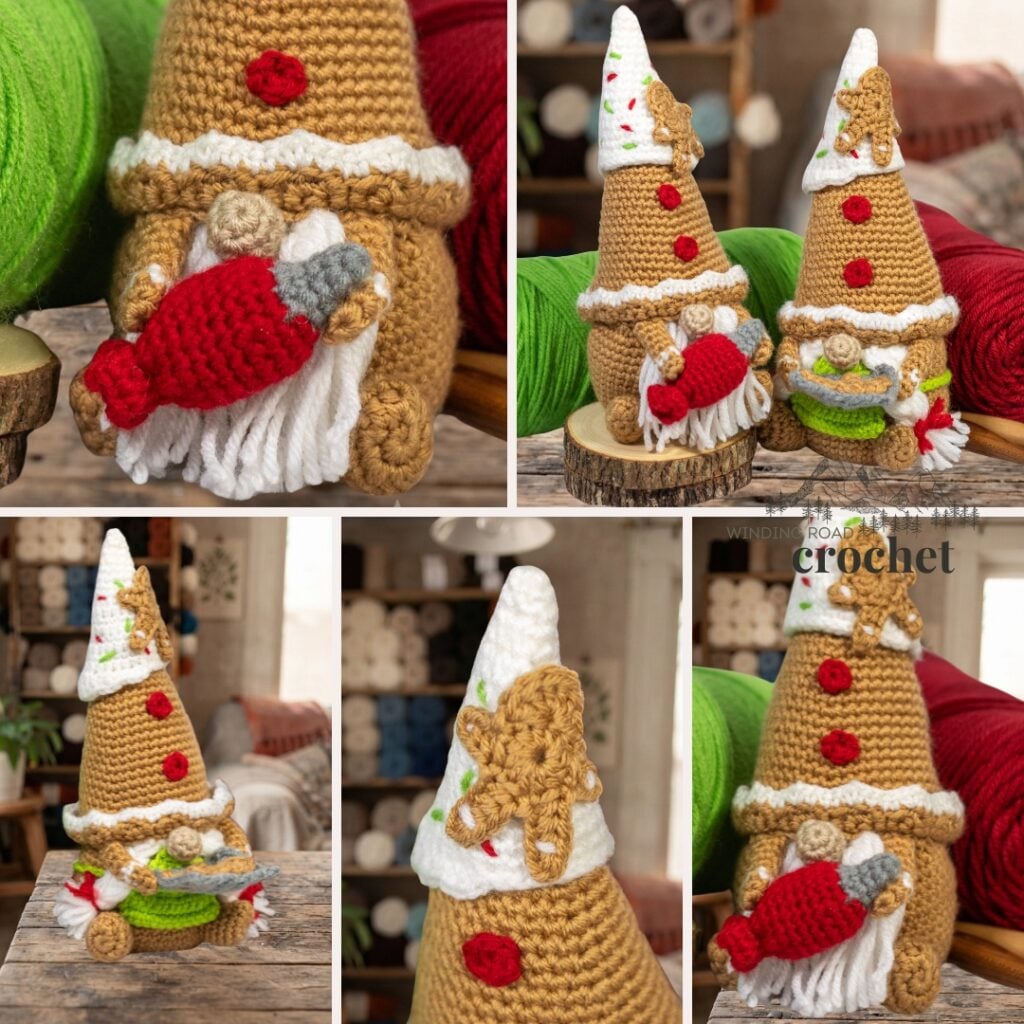
This post may contain affiliate links. For more information, refer to my Terms and Conditions.
Crochet Gingerbread Cookie Gnome For the Holidays
It is never too early to make decorations for Christmas and that means gingerbread cookies and Christmas trees are just waiting to be made. Decorate your home with a fun little gingerbread cookie gnome couple. Make the male and female in many different colors. Check out more holiday, profession, and sports gnomes here.
Check out these other gnome crochet patterns below.


This post may contain affiliate links. For more information refer to my Terms and Conditions.
How to Customize Your Crochet Gingerbread Cookie Gnome Couple
These are your gingerbread cookie gnomes, so make them unique. Change the colors of their hat, body, and more. You can change their skin tone too and change the color of their hair.
I like to use the Red Heart Super Saver colors Aran for fair skin, buff for medium skin tones, cafe latte for dark skin tones, and coffee for very dark skin tones.
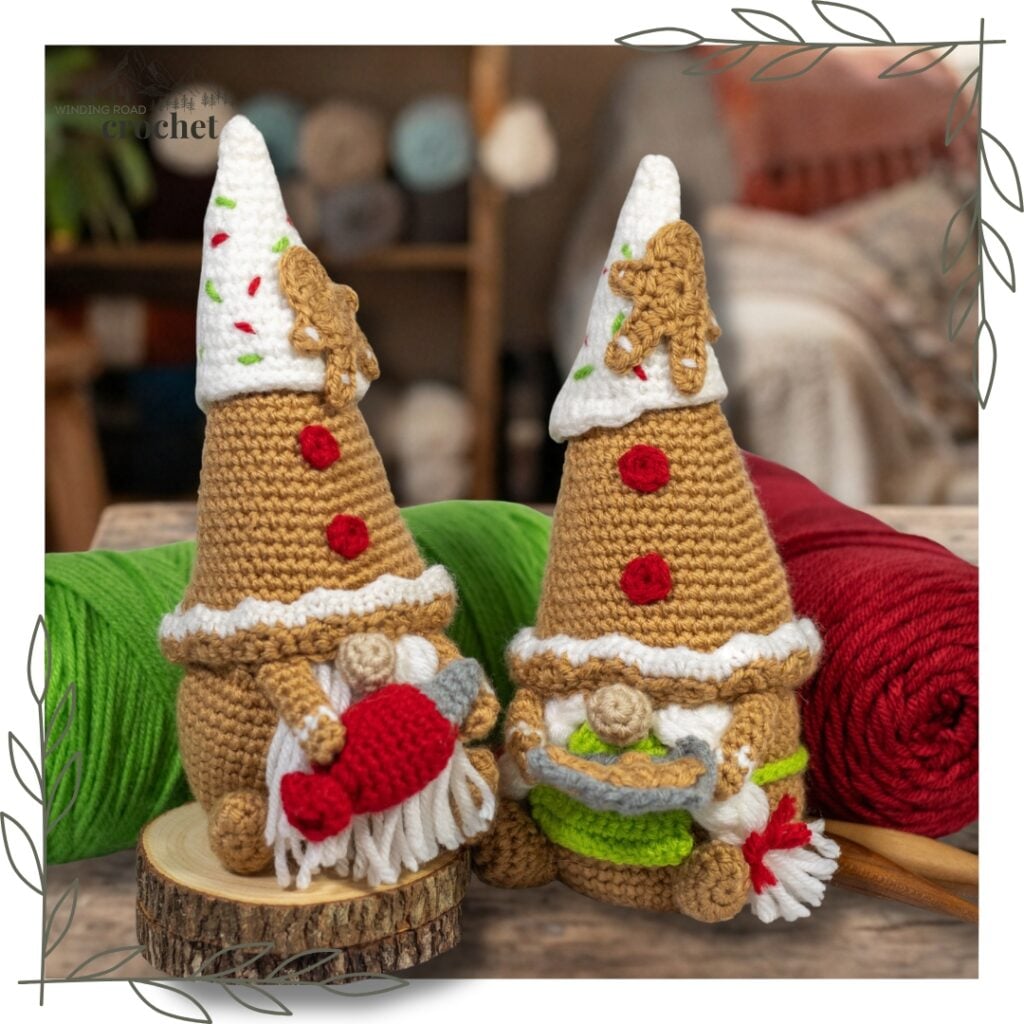
crochet supplies
Yarn
I Love This Yarn Acrylic (Weight: 4/medium – 364 yds / 333 m, 7 oz/ 198 g)
Red Heart Super Saver (Weight: 4/medium – 364 yds / 333 m, 7 oz/ 198 g)
Yarn Quantity
2.8 oz or 160 yds of Latte (Caramel Brown)
0.7 oz or 40 yds of Ivory (Off White)
0.3 oz or 18 yds of Buff (Red Heart Super Saver)
0.2 oz or 12 yds of Off White (Beard and Braids)
0.2 oz or 12 yds of Fire (Red)
0.2 oz or 12 yds of Limelight (Green)
Yarn Substitutions
Any worsted weight (weight # 4) yarn would be fine. Just make sure to check your gauge before starting your project. Suggestions include Red Heart Super Saver, Bernat Value, Red Heart With Love, I Love This Yarn from Hobby Lobby.
Hook
Crochet Hook, Size E, 3.5mm
Notions
- Polyfil
- Yarn Needle
- Scissors
- Locking Stitch Markers
- Hot Glue and Applicator (Optional)
- **Shop my Favorite Tools Here**

Skill Level – Easy
For this project, you must know how to work a magic circle, (though an alternative method is given). You must know how to work a pattern repeat, and decrease with a single crochet.
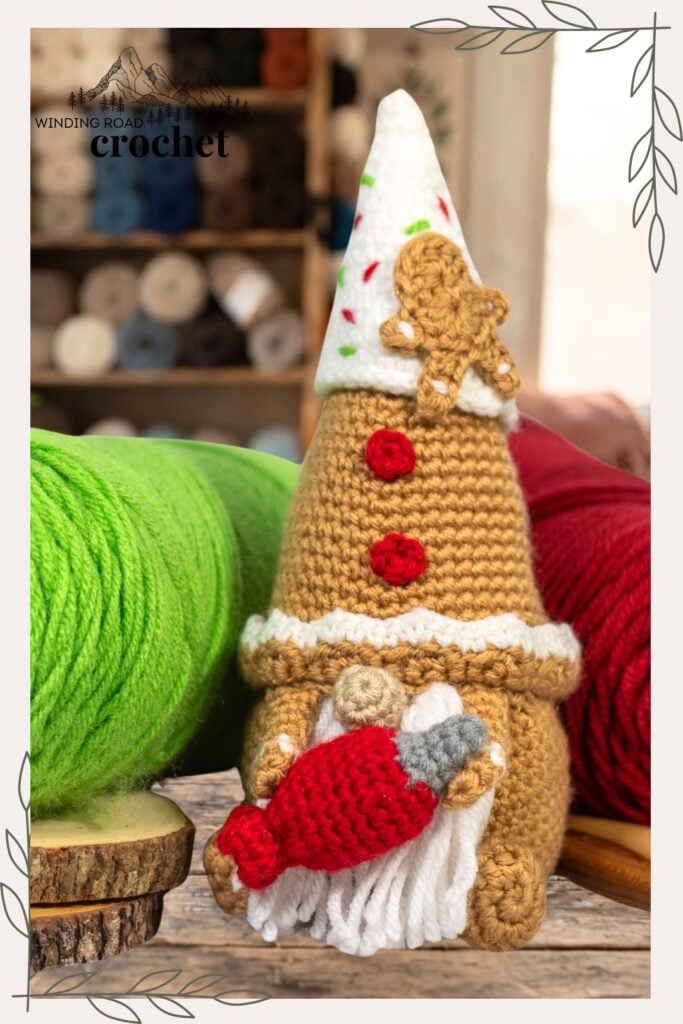
Stitches + Abbreviations
CH – Chain
MC – Magic Circle
SC – Single Crochet
HDC – Half Double Crochet
DC – Double Crochet
TR – Treble Crochet
SLST – Slip Stitch
ST(s) – Stitch(es)
SC2TOG – Single Crochet 2 stitches together
Gauge
5 SC x 6 Rows = 1 inch
Size
The final Gnome is about 7 inches tall.
Special Stitches
SC2TOG – Single Crochet 2 Stitches Together – Insert your hook into the next stitch, yarn over, pull the loop through the hook (2 loops on hook), insert hook into the next stitch, yarn over, pull the loop through the hook, (3 loops on the hook) yarn over and pull the first loop through all the loops on the hook. Your decrease is complete.
pattern notes
- The pattern is written using American crochet terms.
- The pattern will be worked in a continuous round if not otherwise stated.
- Use a stitch marker to keep track of your rows.
- The Crochet Gingerbread Gnome Couple pattern is copyrighted by Winding Road Crochet.
- Some patterns have an alternative round 1, this round can be used in place of round 1 and does not require a magic circle or ring.
- The turning chain does not count as a stitch if working in rows. (Tray, Apron)
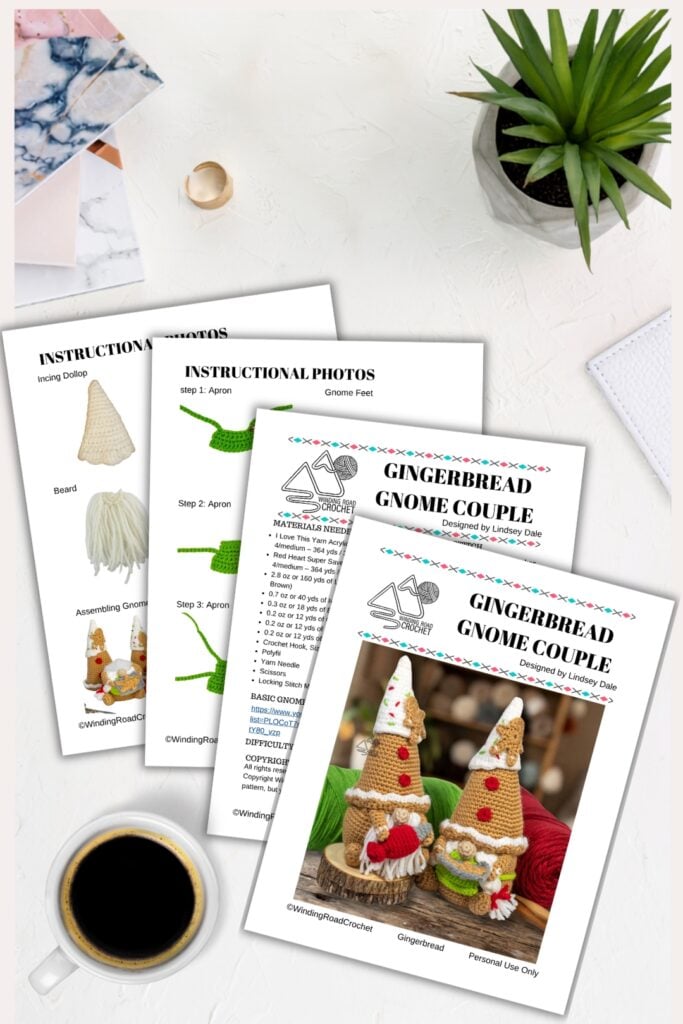
Upgrade to the Printable PDF.
Get the written pattern formatted into an easy-to-print PDF. It is perfect for on-the-go or on-the-couch crocheting.
PDF includes links to the video tutorial and instruction photos moved to the last page to help save on ink.
video tutorials
I have completed a video series that will walk you through how to crochet the basic gnome from start to finish. It does not include the icing dollop on the hat or the zig-zag hat brim and other pieces unique to this pattern.
Episode 1: Gnome Body (Plus Amigurumi Basics)
Episode 2: Nose, Arms, Feet
Episode 3: Beard and Braids
Episode 4: Gnome Hat
Episode 5: Assembling Your Gnome
Other Helpful Videos
Easy way to make a Magic Circle
How to Change Colors in Crochet
crochet gingerbread cookie gnome couple pattern
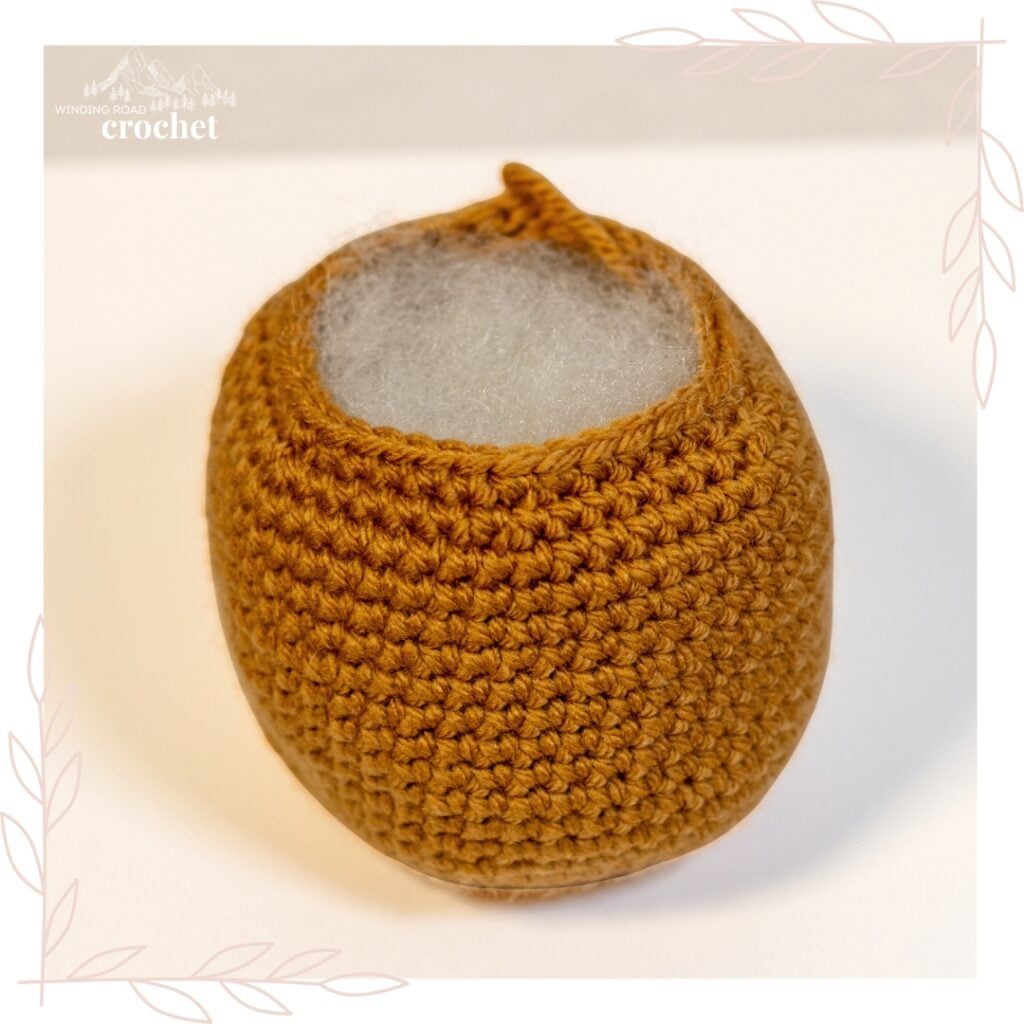
Gnome Body (Make 2)
With Latte (Caramel Tan).
Round 1: Work 6 SC in a Magic Circle. (6)
Alternate Round 1: CH2, Work 6 SC into 2nd CH from hook. (6) (Use this row if you do not want to use a magic circle.)
Round 2: *2SC in the next ST* repeat from *to* a total of 6 times. (12)
Round 3: *SC in the next ST, 2SC in the next ST,* repeat from *to* a total of 6 times. (18)
Round 4: *SC in the next 2 STs, 2SC in the next ST,* repeat from *to* a total of 6 times. (24)
Round 5: *SC in the next 3 STs, 2SC in the next ST,* repeat from *to* a total of 6 times. (30)
Round 6: *SC in the next 4 STs, 2SC in the next ST,* repeat from *to* a total of 6 times. (36)
Round 7: *SC in the next 5 STs, 2Sc in the next ST,* repeat from *to* a total of 6 times. (42)
Round 8: *SC in the next 6 STs, 2SC in the next ST,* repeat from *to* a total of 6 times. (48)
Rounds 9-20: SC in the next STs. (48)
Round 21: *SC in the next 6 STs, SC2TOG,* repeat from *to* a total of 6 times. (42)
Round 22: *SC in the next 5 STs, SC2TOG,* repeat from *to* a total of 6 times. (36)
Round 23: SLST to the next 2 STs to smooth out the edge. Leave the rest of the row unworked.
Fasten off. Weave in ends.
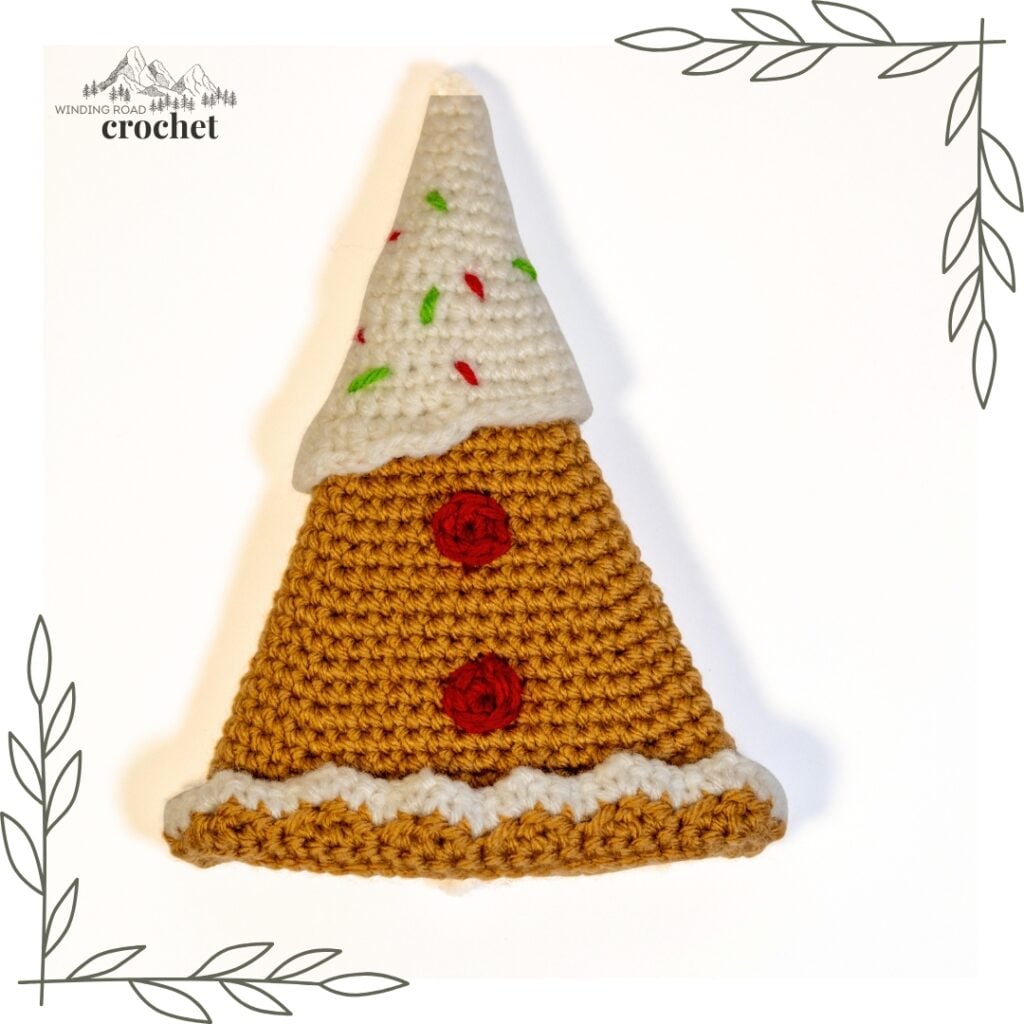
Gingerbread Gnome Hat (Make 2)
With Latte. (Caramel Tan)
Round 1: Work 3 SC in a Magic Circle. (3)
Alternative Round 1: CH2, Work 3 SC into 2nd CH from hook. (3) (Use this row if you do not wish to use a magic circle.)
Round 2: *2SC in the next St* repeat from *to* a total of 3 times. (6)
Round 3: SC in the next 6 Sts. (6)
Round 4: *SC in the next St, 2SC in the next St,* repeat from *to* a total of 3 times. (9)
Round 5: SC in the next 9 Sts. (9)
Round 6: *SC in the next 2 Sts, 2SC in the next St,* repeat from *to* a total of 3 times. (12)
Round 7: SC in the next 12 Sts. (12)
Round 8: *SC in the next 3 Sts, 2SC in the next St,* repeat from *to* a total of 3 times. (15)
Round 9: SC in the next 15 Sts. (15)
Round 10: *SC in the next 4 Sts, 2SC in the next St,* repeat from *to* a total of 3 times. (18)
Round 11: SC in the next 18 Sts. (18)
Round 12: *SC in the next 5 Sts, 2SC in the next St,* repeat from *to* a total of 3 times. (21)
Round 13: SC in the next 21 Sts. (21)
Round 14: *SC in the next 6 StS, 2Sc in the next St,* repeat from *to* a total of 3 times. (24)
Round 15: SC in the next 24 Sts. (24)
Round 16: *SC in the next 7 Sts, 2SC in the next St,* repeat from *to* a total of 3 times. (27)
Round 17: SC in the next 27 Sts. (27)
Round 18: *SC in the next 8 Sts, 2SC in the next St,* repeat from *to* a total of 3 times. (30)
Round 19: SC in the next 30 Sts. (30)
Round 20: *SC in the next 9 Sts, 2SC in the next St,* repeat from *to* a total of 3 times. (33)
Round 21: SC in the next 33 Sts. (33)
Round 22: *SC in the next 10 Sts, 2SC in the next St,* repeat from *to* a total of 3 times. (36)
Round 23: SC in the next 36 Sts. (36)
Round 24: *SC in the next 11 Sts, 2SC in the next St,* repeat from *to* a total of 3 times. (39)
Round 25: SC in the next 39 Sts. (39)
Round 26: *SC in the next 12 Sts, 2SC in the next St,* repeat from *to* a total of 3 times. (42)
Round 27: SC in the next 42 Sts. (42)
Round 28: *SC in the next 13 St, 2SC in the next St,* repeat from *to* a total of 3 times. (45)
Round 29: SC in the next 45 Sts. (45)
Round 30: *SC in the next 14 Sts, 2Sc in the next St,* repeat from *to* a total of 3 times. (48)
Round 31: SC in the next 48 Sts. (48)
Round 32: *SC in the next 15 Sts, 2Sc in the next St,* repeat from *to* a total of 3 times. (51)
Round 33: *SC in the next 8 Sts, 2SC in the next St,* repeat from *to* a total of 6 times. (60)
Round 34: SC into BLO of the next 51 STs.
Round 35: *SLST to the next ST, HDC into the next ST, DC into the next ST, HDC into the next ST,* repeat from *to* a total of 12 times. SLST into the next 3 STs.
Change to white yarn.
Round 36: SC into the first 2 STs, (SC, CH1, SC) into the next ST. *SC into the next 3 STS, (SC, CH1, SC) into the next ST.* repreat from *to* a total of 11 times. SC into the next 2 STs, SLST into the last 2 STs. Fasten off and weave in your ends.
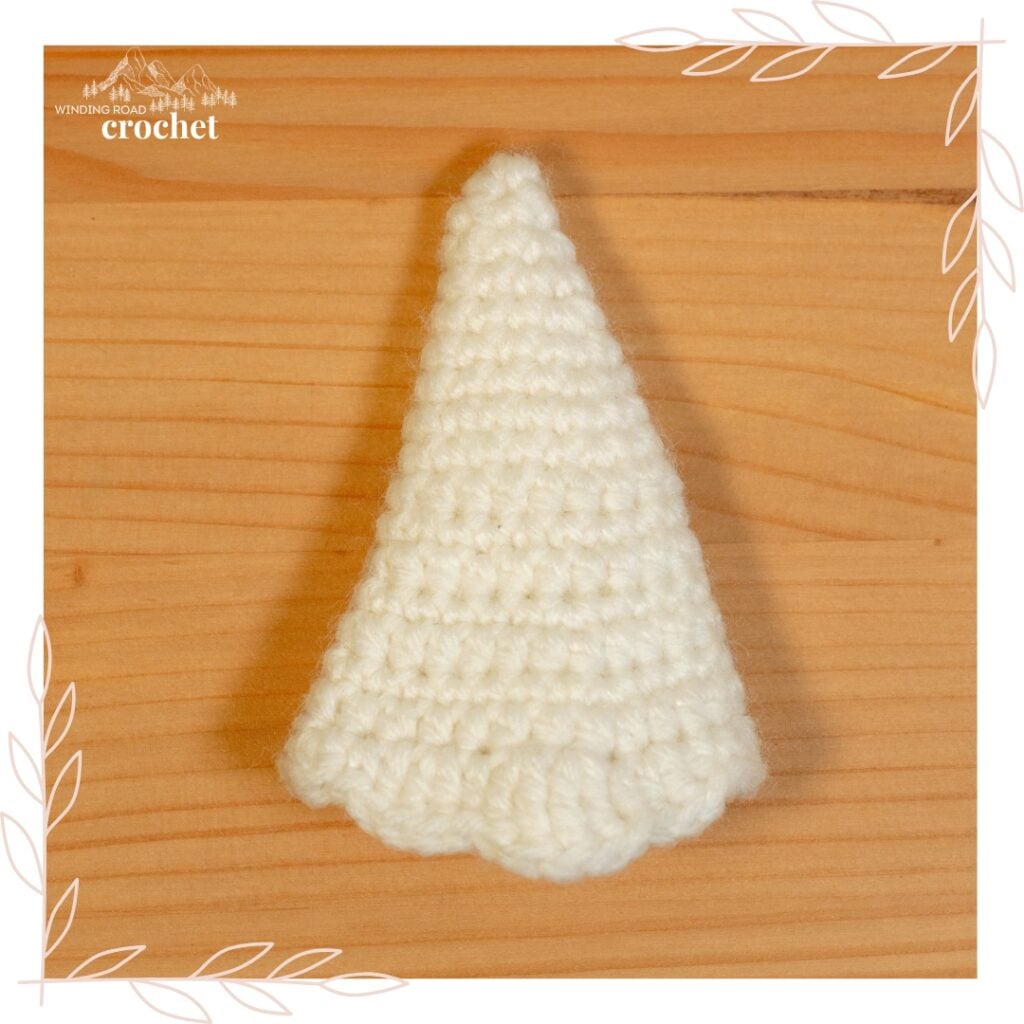
Icing Dollop for Hat (Make 2)
With Ivory (off white).
Round 1: Work 3 SC in a Magic Circle. (3)
Alternative Round 1: CH2, Work 3 SC into 2nd CH from hook. (3) (Use this row if you do not wish to use a magic circle.)
Round 2: *2SC in the next St* repeat from *to* a total of 3 times. (6)
Round 3: SC in the next 6 Sts. (6)
Round 4: *SC in the next St, 2SC in the next St,* repeat from *to* a total of 3 times. (9)
Round 5: SC in the next 9 Sts. (9)
Round 6: *SC in the next 2 Sts, 2SC in the next St,* repeat from *to* a total of 3 times. (12)
Round 7: SC in the next 12 Sts. (12)
Round 8: *SC in the next 3 Sts, 2SC in the next St,* repeat from *to* a total of 3 times. (15)
Round 9: HDC in the next 8 Sts. SC in the next 7 Sts. (15)
Round 10: *SC in the next 4 Sts, 2SC in the next St,* repeat from *to* a total of 3 times. (18)
Round 11: HDC into the next 9, SC in the next 9 Sts. (18)
Round 12: *SC in the next 5 Sts, 2SC in the next St,* repeat from *to* a total of 3 times. (21)
Round 13: HDC in the next 11 Sts. SC in the next 10 Sts. (21)
Round 14: *SC in the next 6 Sts, 2Sc in the next St,* repeat from *to* a total of 3 times. (24)
Round 15: HDC in the next 12 Sts, SC in the next 12 Sts. (24)
Round 16: *SC in the next 7 Sts, 2SC in the next St,* repeat from *to* a total of 3 times. (27)
Round 17: HDC in the next 14 Sts, SC in the next 13 Sts. (27)
Round 18: SC in the next ST, HDC in the next ST, Work 3 HDC in the next ST, SC in the next ST, HDC in the next ST, Work 2 DC in the next ST, HDC in the next ST, Work 2 TR in the next 2 STs, HDC in the next ST, Work 2 DC in the next ST, HDC in the next ST, SC in the next ST, Work 3 HDC in the next ST, skip a stitch, SLST into the next 12 STs. (34 STs)
Fasten off and leave a 9-inch yarn end to sew the icing on top of the hat. Use green and red yarn to make small stitches all over the icing to look like sprinkles.
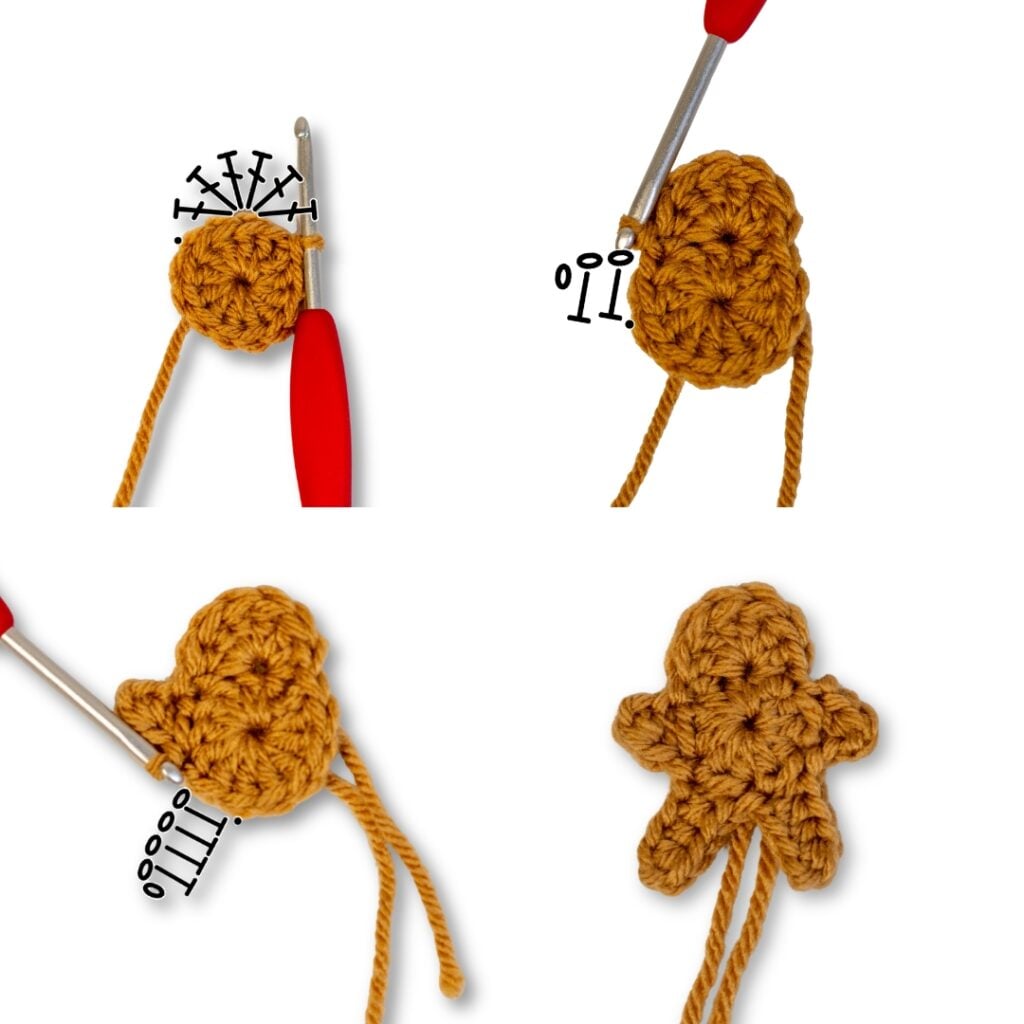
Gingerbread Cookie (Make 3)
With Latte (Caramel Tan).
Round 1: Make a Magic Circle, CH 2 (Does not count as a ST), Work 12 HDC into the Magic Circle. SLST to the first ST. (12)
Alternative Round 1: CH3 (Does not count as a ST), Work 12 HDC into the 3rd CH from hook. SLST to the first ST. (12) (Use this row if you do not wish to use a magic circle.)
Round 2: Skip a ST, work 6DC into the next ST, Skip a ST, SLST to the next ST. CH 3, Work a HDC into the 2nd and 3rd CH from the hook (this creates the first arm.) Skip a ST in row 1 and SLST to the next ST.
CH 5, HDC into the 2nd, 3rd, 4th and 5th CH from the hook (this creates the first leg), Skip a ST in row 1 and SLST to the next ST.
CH 5, HDC into the 2nd, 3rd, 4th and 5th CH from the hook (this creates the second leg), Skip a ST in row 1 and SLST to the next ST.
CH 3, Work a HDC into the 2nd and 3rd CH from the hook (this creates the second arm.) Skip a ST in row 1 and SLST to the first ST of the row.
Fasten off and leave a yarn end to sew the cookie to the hat of the gnomes and to the cookie tray. If you choose, you can also use a little yarn to embroider eyes, mouth, and buttons onto the cookie.
Gumdrop Buttons (Make 4)
With Red yarn.
Round 1: Work 6 SC into the Magic Circle. SLST to the first ST. (6)
Alternative Round 1: CH2. Work 6 SC into the 2nd CH from hook. SLST to the first ST. (6) (Use this row if you do not wish to use a magic circle.)
Fasten off, leaving a 6-inch yarn end to sew the button to the gnome hats.
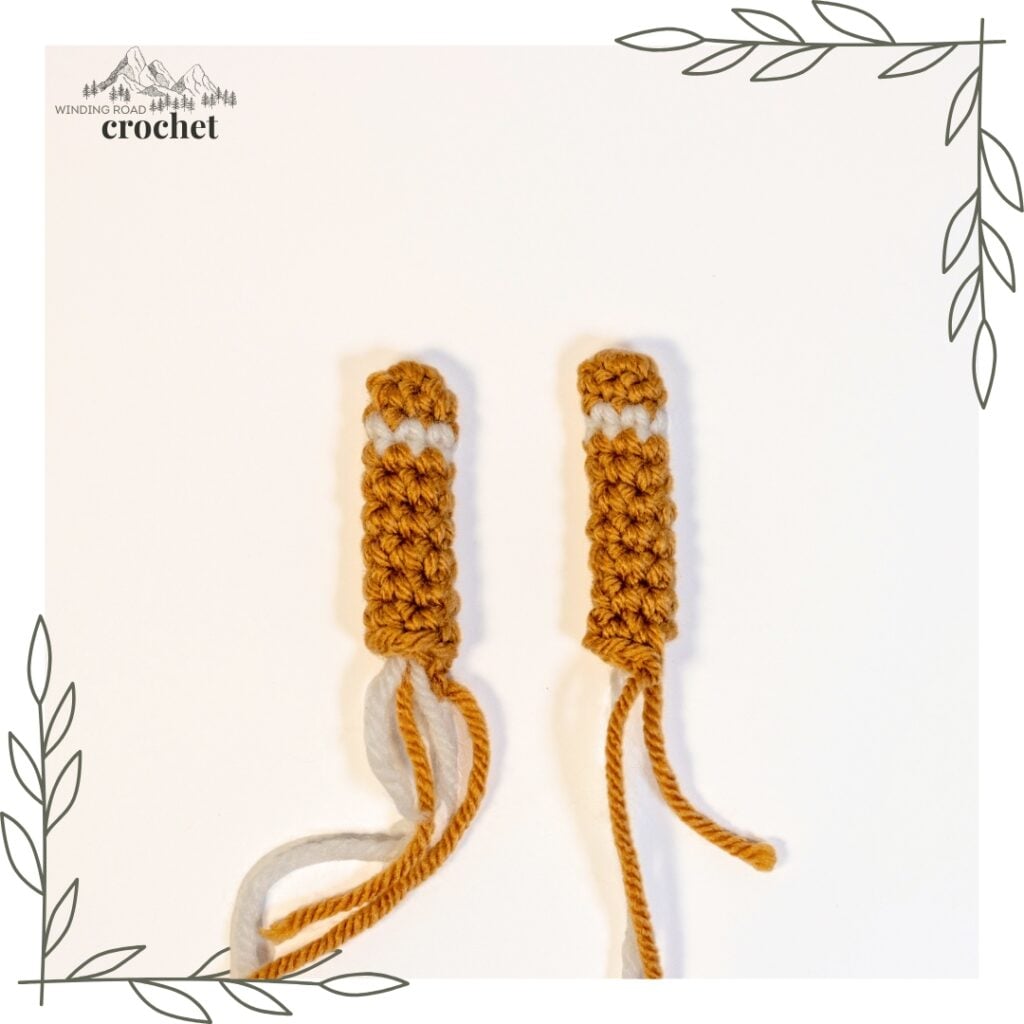
Arms (Make 4)
With Latte (Caramel Tan)
Round 1: Work 6 SC in a MC. (6)
Alternative Round 1: CH2, Work 6 SC into 2nd CH from hook. (6)
Round 2: SC in the next 6 Sts. (6)
Change to Off White.
Round 3: SC in the next 6 Sts. (6)
Change to Latte (Caramel Tan)
Rounds 4-9: SC in the next 6 Sts. (6)
Fasten off, leaving a 10-inch tail to sew the arm to the body.
Cookie Tray (Make 1)
With Light Grey yarn, CH 10.
Row 1: SC in the 2nd CH from the hook. SC into the next 8 CH. (9)
Row 2-11: CH 1, turn, SC into the next 9 STs. (9)
Fasten off, leave a 10-inch yarn end to sew the tray to the female gnome’s hands after you have sewn the cookie to the tray.
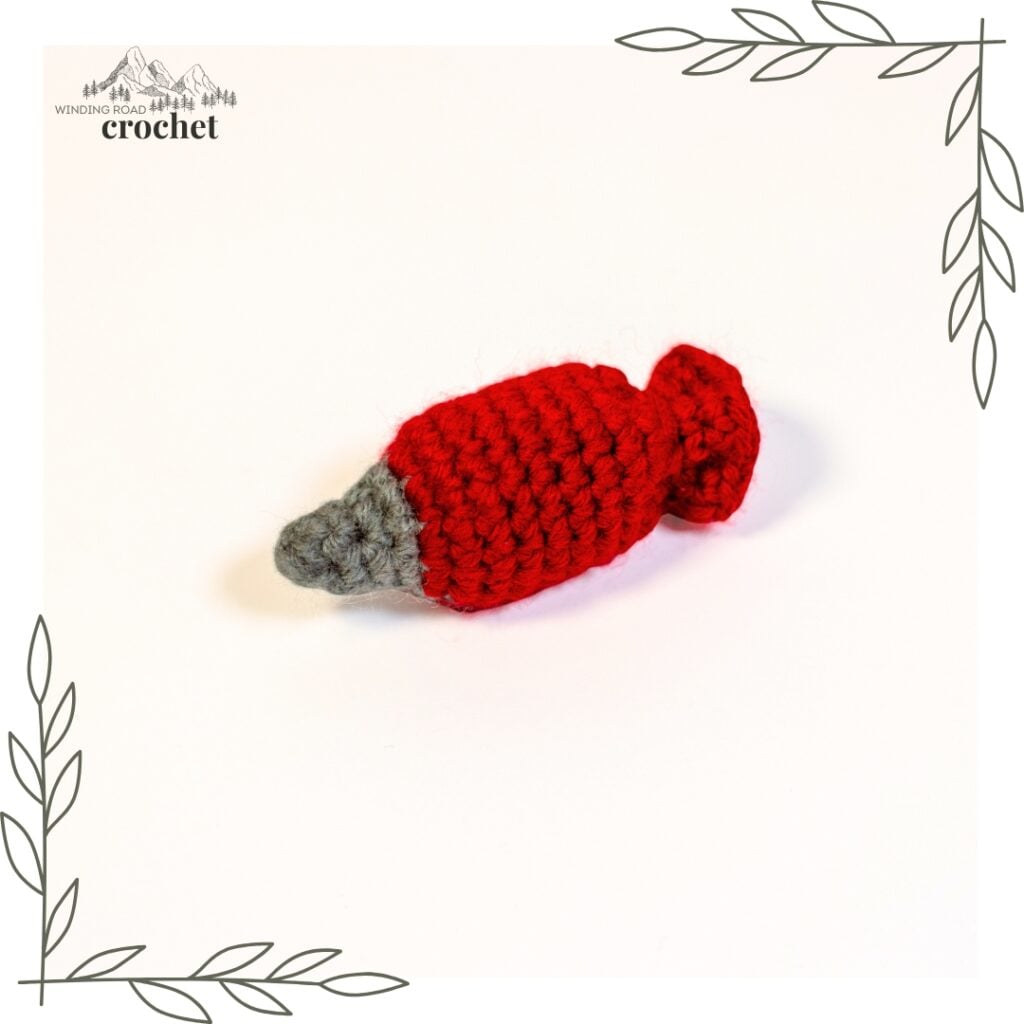
Icing Bag
With Light grey yarn.
Round 1: Work 3 SC in a Magic Circle. (3)
Round 2: Work a SC into the next 3 STs. (3)
Round 3: Work 2 SC into the next 3 STs. (6)
Round 4: *SC into the next ST, work 2 SC into the next ST* repeat from *to* a total of 3 times. (9)
Change to Red yarn.
Round 5: Work 2 SC into the next 9 STs. (18)
Rounds 6 – 17: SC into the next 17 STs, SLST to the last ST. (18)
Fasten off, leaving a 10-inch yarn end. Stuff the icing tube. Next, use a yarn end to weave the yarn down two rows of stitches, then create a gathering stitch along row 15. Pull tight and secure the yarn with a few stitches and a knot. Weave in your yarn end.
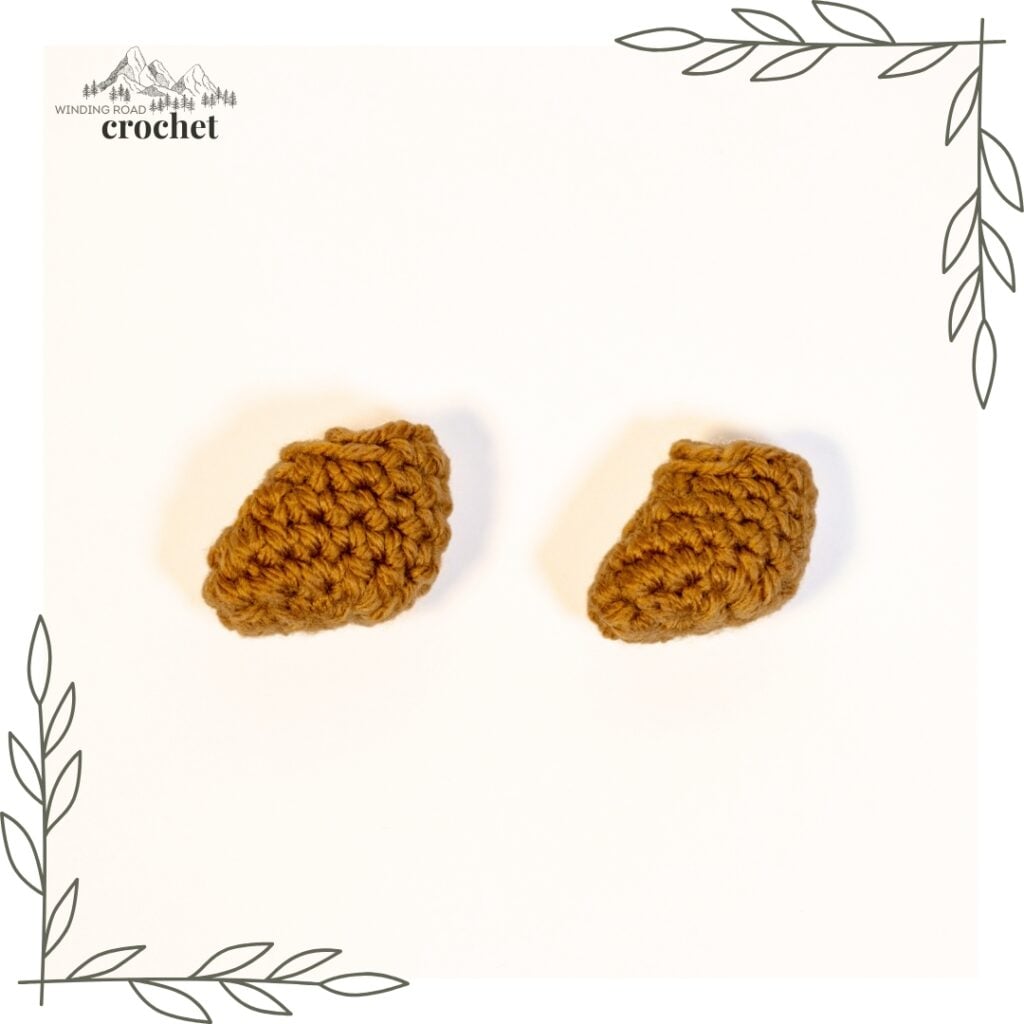
Feet (Make 4)
With Latte (Caramel Tan).
Round 1: Work 8 SC in a MC. (8)
Alternative Round 1: CH2, Work 8 SC into 2nd CH from hook. (8)
Round 2: Work 2HDC in next 2 STs, Work 2SC in next 2 STs, Work 2HDC in next 2 STs, Work 2SC in next 2 STs. (16)
Round 3: SC in next 16 STs. (16)
Round 4: SC2TOG, SC2TOG, SC in next 10 STs, SC2TOG. (13)
Round 5: SC2TOG, SC2TOG, SC in next 7 STs, SC2TOG. (10)
Round 6: SC in next 8 STs, SLST, SLST.
Fasten off, leaving a long tail.
Lightly stuff the feet and sew them to the front of the gnome’s body.

Larger Gnome Nose
With Buff (skin tone) yarn.
Round 1: Work 6 SC in a MC. (6)
Round 2: *SC in the next ST, Work 2SC into the next ST* repeat from *to* a total of times. (9)
Round 3: SC in the next 9 STs. (9)
Round 4: *SC in next ST, SC2TOG* repeat from *to* a total of 3 times.(6)
Fasten off leaving a 10-inch tail to sew the nose to the body.
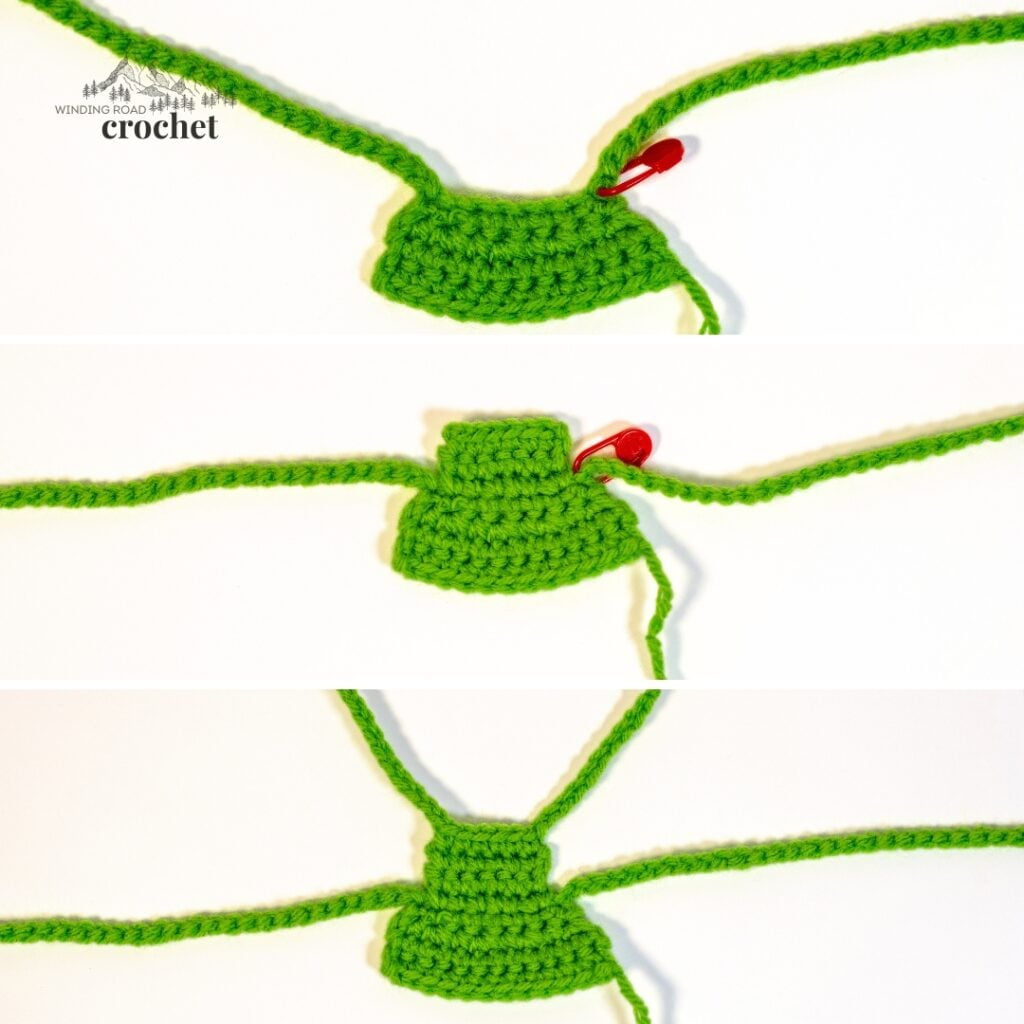
Gnome Apron (Make 1)
The piece is worked in both steps and rows.
With Green yarn.
Step 1: Waist Tie
CH 39, Mark the last ST with a stitch marker. CH 45. Fasten off and weave in your ends into the chain.
Step 2: Bottom of the Apron
Bottom Row 1: Hold the chain at the ST marker with the shorter end of the chain by your hook hand. SLST to the CH with the ST marker. CH1, and SC into the same ST. SC into the next 7 STs. (8)(Do not remove the ST Marker)
Bottom Row 2: CH 1, turn, *SC into the next ST, work 2 SC into the next ST*, repeat from *to * a total of 4 times. (12)
Bottom Row 3 – 4: CH 1, turn, SC into the next 12 STs.
Fasten off and weave in your yarn end.
Step 3: Top of Apron and Neck Tie.
Turn over the chain so you are working into the bottom of the stitches that make up the bottom of the apron.
Top Row 1: SLST to the ST, directly next to the ST marker that has a SC worked into it already. CH1, SC into the same ST as the SLST, SC into the next 5 STs. (6)
Top Rows 2 – 3: Ch 1, turn, SC into the 6 STs. Fasten off and weave in your ends.
Top Row 4: Create a new Chain, CH 10, work a SC into each of the 6 STs of Row 3. CH 10. Fasten off. (This creates the last row of the apron and the neck ties.
Use the last yarn ends to sew the top of the apron in place.

Crochet Gnome Beard (Male Gnome)
With White yarn.
Row 1: Work 3 SC into a magic circle. (Alternative: CH2, work 3 SC into 2nd CH from hook.)
Row 2: CH1, turn, Work 2 SC into the first ST, Work 3 SC into the next ST, Work 2 SC into last ST. Fasten off.
Cut 21 eight-inch strands of yarn for the beard. Group three strands together and attach them to the 7 single crochet like you would add fringe to a scarf. (See Photo Above)
Before stuffing your gnome, sew your beard onto your gnome. Make sure to leave room for the nose and keep the top edge close to the edge of the top of the body to hide them with the hat.
If you choose, braid your beard and secure it with a small piece of yarn.
Give your beard a little trim to shape and lightly mist it with some water, style the beard and let it dry that way to hold that shape.
If you wish, you can untwist the yarn in the beard to have more hair-like strands.

Braids (Make 2) (For Female Gnome)
CH7 with Off White.
Row 1: Sc in the 2nd CH from hook and each CH across. Fasten off. (6)
Cut 24 10-inch strands of gold yarn for the two braids. Attach two strands of yarn to each Single Crochet like you would attach fringe to a scarf. Grab 3 groups of 8 strands and braid the hair together. Use a piece of yarn to secure the braids at the bottom. Sew the braids onto the body of the gnome before stuffing the gnome.
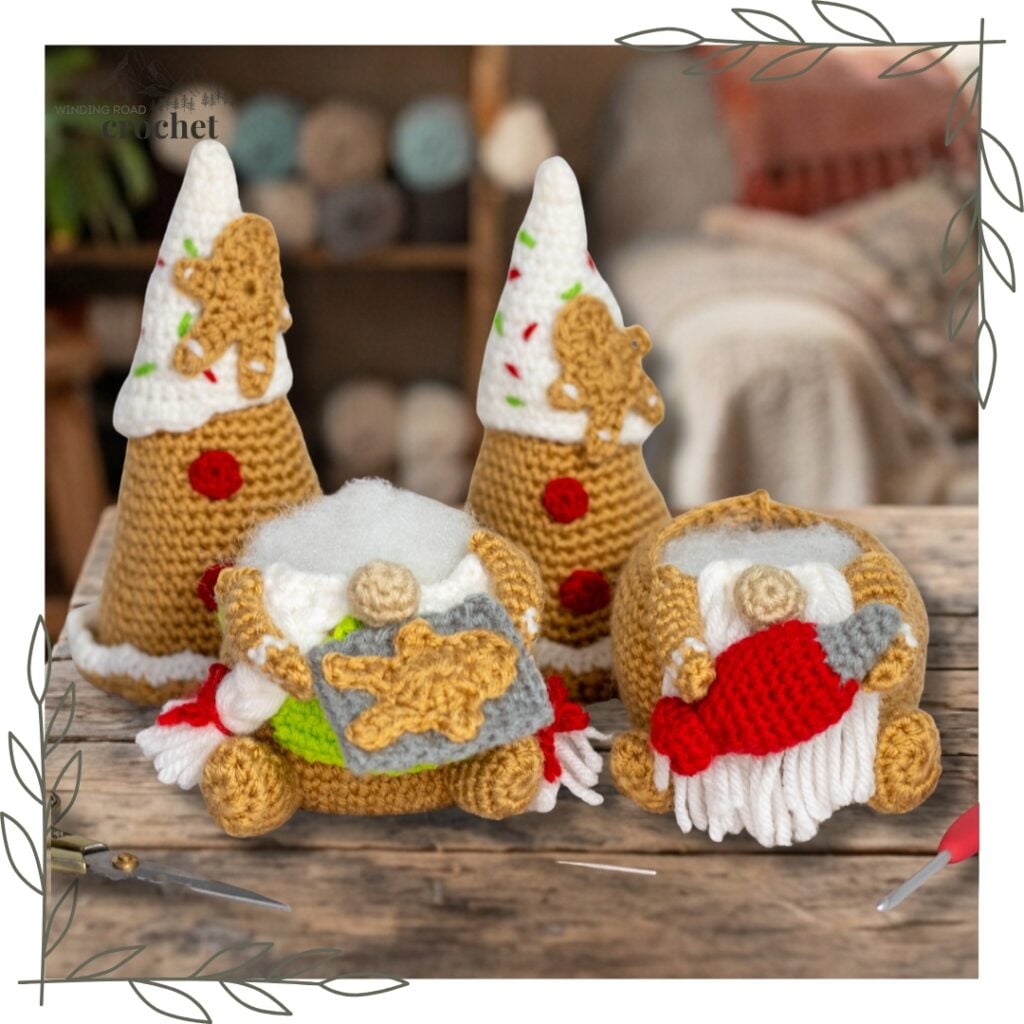
Crochet Gingerbread Cookie Gnomes Assembly Instructions
You can use a yarn needle and yarn to sew each piece together in the order listed below. I have hot-glued pieces together in the past, but since my kids have taken to playing with my decorations, I have begun to sew all pieces together for safety.
1. Sew the feet to the front of the gnomes.
2. Stuff the gnomes’ bodies.
3. For the man: Sew the beard onto the gnome. Style the beard and trim it. Sew the nose on top of the beard.
4. For the woman, sew the nose in the center of the gnome and sew the braids on each side of the nose.
5. Sew a gingerbread cookie to the tray and sew the try to the woman’s arms.
6. Sew the icing bag in the male gnome’s arms.
7. Sew a gingerbread cookie to each icing dollop and sew the icing dollop on top of each hat.
6. Sew the red gumdrop buttons to each gnome hat.
7. Sew the hat onto the gnomes.
8. Enjoy your gnomes!
I truly hope you enjoyed the crochet gingerbread cookie gnome couple pattern and will check back for more fun crochet gnome patterns.
Want to know what I am making next? Follow me on Instagram @windingroadcrochet to see sneak peeks of what I am up to and to be notified of when I release new free patterns. You can also follow me on Pinterest and Facebook. Join our Facebook group Our Crochet Journey and be a part of our community. Share, photos, ask for help and be inspired all in one place!
Written pattern, tutorials, photos, graphs, and pdfs of the Crochet Gingerbead Cookie Gnome Couple free pattern are copyright Windingroadcrochet.com. Please do not reprint or repost this content as your own, but please feel free to share this link with others. You can find more information on sharing my work with others on the Terms and Conditions Page.