This any stitch Tunisian Crochet Hat is the second practice crochet pattern in the Tunisian Crochet Course. Below you will find step by step tutorial that will walk you through how to crochet this hat. We will start with a crochet ribbed brim then work Tunisian crochet onto that. This is a long tutorial so let’s jump right in.
Tunisian Crochet Hat Materials
This post may contain affiliate links. For more information refer to my Terms and Conditions.
2.8 oz or 146 yds of Red Heart Super Saver (Size 4 Yarn) for largest size hat.
6.5mm Tunisian Crochet Hook
5 mm Crochet Hook (for brim)
Yarn Needle
Scissors
Pom-Pom (optional)
Tailor’s Flexible Measuring Tape
**Shop my Favorite Tools Here**
Stitches and Abbreviations
CH – Chain
SC – Single Crochet
BLO – Back Loop Only
Tss – Tunisian Simple Stitch
Tks – Tunisian Knit Stitch
Lts – Last Tunisian Stitch
FwdP – Forward Pass
RetP – Return Pass
ST(s) – Stitch(es)
Special Stitches
All these stitches and passes are covered in the Tunisian crochet course.
Last Tunisian stitch – Lts – Insert your hook under both vertical loops of the last stitch on the forward pass and complete as you would a Tunisian simple stitch.
Return Pass – RetP – CH1, *yarn over, pull through the 2nd and third loop on the hook* repeat from *to* until only 1 loop remains on the hook.
Size and Gauge
Instructions will be provided for many different sizes and you will be able to adjust this to make a custom size. For this pattern, we are not concerned with the gauge. Instead, we will crochet until we reach a certain measurement, so keep your measuring tape nearby.

Tunisian Crochet Hat Construction
The entire project is worked as a rectangle then sewn down one side and gathered at the top. We will start by crocheting a ribbed brim, then pull up loops from the side of the brim rows and work Tunisian crochet for the body of the hat.
Tunisian Crochet Hat Video Guide
Check out the crochet beanie video guide and don’t forget to subscribe to my YouTube Channel for more fun crochet video tutorials.
Step 1: Tunisian Hat Brim
Using worsted weight yarn, follow the pattern below to create a hat brim. The way this tutorial is written you can actually use any size yarn and any size hook just crochet until you meet the right measurements.
CH 10 (You can adjust this starting chain adjust the thickness of the brim.)
Row 1: SC in the 2nd CH from the hook and each CH across. (9)
Row 2-?: CH1, turn SC in the BLO of each ST across.

Continue to repeat row 2 until the brim is as long as you need it for the size hat that you are making. Use the chart below to determine how long the brim needs to be. You will need your measuring tape to check the length. You are aiming for 1-2 inches shorter than the head circumference.

If you are working a Tunisian simple stitch, knit stitch or full stitch hat, any number of rows will be fine. If you are working a smock stitch hat, you will want an even number of rows.
Step 2: Tunisian Crochet Foundation Row
Now we will transfer from regular crochet to Tunisian crochet by pulling loops up from the side of the brim rows.

Take the loop still on your crochet hook and put that on your Tunisian crochet hook. Using your crochet hook, insert your hook into the side of the next stitch, yarn over, and pull up a loop, place this new loop on your Tunisian crochet hook. Repeat this process until you have a loop on your Tunisian crochet hook for every row you crocheted in the brim.

Once all the loops are on your hook, you will work a normal return pass. Chain 1, Yarn over and pull through two loops. Yarn over and pull through two more loops, repeat this process until you have only one loop left on your hook.

Step 3: Pick your Stitch and Crochet the Body of your Hat
Now that your foundation row is complete, you will just need to pick your favorite Tunisian crochet stitch and work rows of that stitch until your hat reaches the correct height for the size you are making. You can use the chart below to determine how tall your hat should be.


I have created hats using the Tunisian simple stitch, knit stitch, full stitch and smock stitch.


Once your hat is tall enough you can work a bind off row. You can use a slip stitch bind off or single crochet bind off. Fasten off leaving a long yarn end to gather the top of your hat.

Step 4: Seam and Gather
Right now we just have a long rectangle and we are going to turn it into a hat. Take your two short ends and bring them together. Use a new yarn strand and yarn needle to whip stitch the two short ends together.

Now we will take the long yarn end at the top of the hat and gather the top together. You are more than welcome to run a gathering stitch around the top of the hat to gather it together. That method works great, but here is a fun new method that I like to use for gathering the top of a hat.

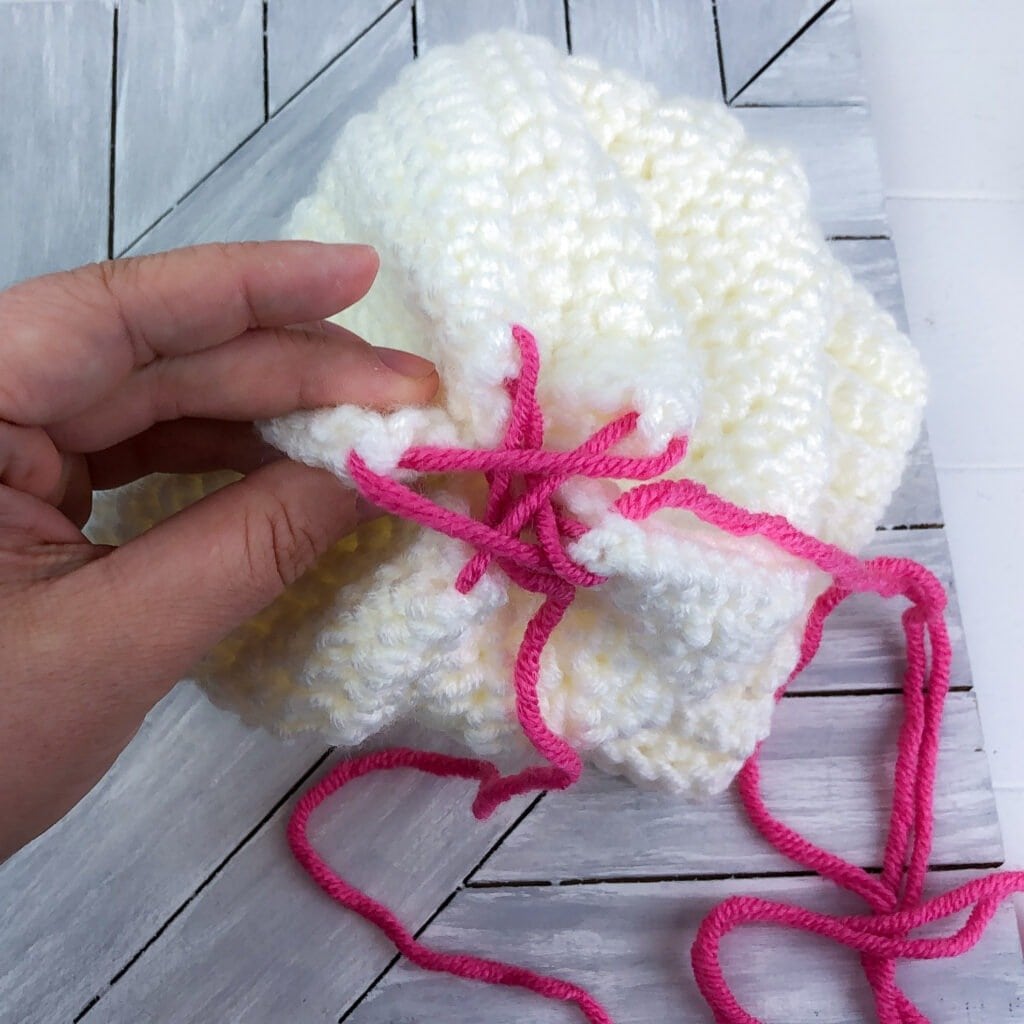
First, using a long strand of yarn you are going to create a star on the top of your hat. Just stitch through one of the last stitches of a row in each place that there would be a star point.


Now pull this yarn tight bringing those five points into the center. This will leave you with 5 folds on the outside of the hat.
Take your yarn once more and make the same star pattern hooking the center of these five folded areas.
Pull this star tight and you will be left with a nice neat fold at the top of your hat. I think this method leaves the top of the hat looking neat enough that it does not need a pom-pom, but I love Pom poms, so sew one on top if you like.
Weave in any loose ends and your Tunisian crochet hat is complete and ready to be gifted or used. Feel free to share a photo of your hat on the Tunisian Hat Facebook group post.


Let’s Be Friends
Want to know what I am making next? Follow me on Instagram @windingroadcrochet to see sneak peeks of what I am up to and to be notified of when I release new free patterns. You can also follow me on Pinterest and Facebook. Join our Facebook group Our Crochet Journey and be a part of our community. Share, photos, ask for help and be inspired all in one place!
Written pattern, tutorials, photos, graphs, and pdfs of the Tunisian Crochet Hat free pattern are copyright Windingroadcrochet.com. Please do not reprint or repost this content as your own, but please feel free to share this link with others. You can find more information on sharing my work with others in the Terms and Conditions Page.
